Showing posts with label party makeup. Show all posts

Friday, 22 September 2017

Bridal Makeup Tips and Tricks you Just Can’t Miss!


Your fairy-tale wedding day look has been your dream since teenage. But it takes an effort to get it all perfect… Discover our top 5 Fav Bridal Makeup Tips and Tricks every girl MUST know!


You already know that the perfectly glowing Indian bride doesn’t happen by chance! So here are the top bridal makeup tips and tricks to help you keep it glowing – just like you’ve always imagined…


Prep up Your Skin!


The Gorgeous Indian Bride!


The most important ingredient of your flawless glowing bride look is… healthy flawless skin! And there are no shortcuts here… so start months ahead with those healthy greens, fresh fruits, and chuck out those fried nasties from your diet.
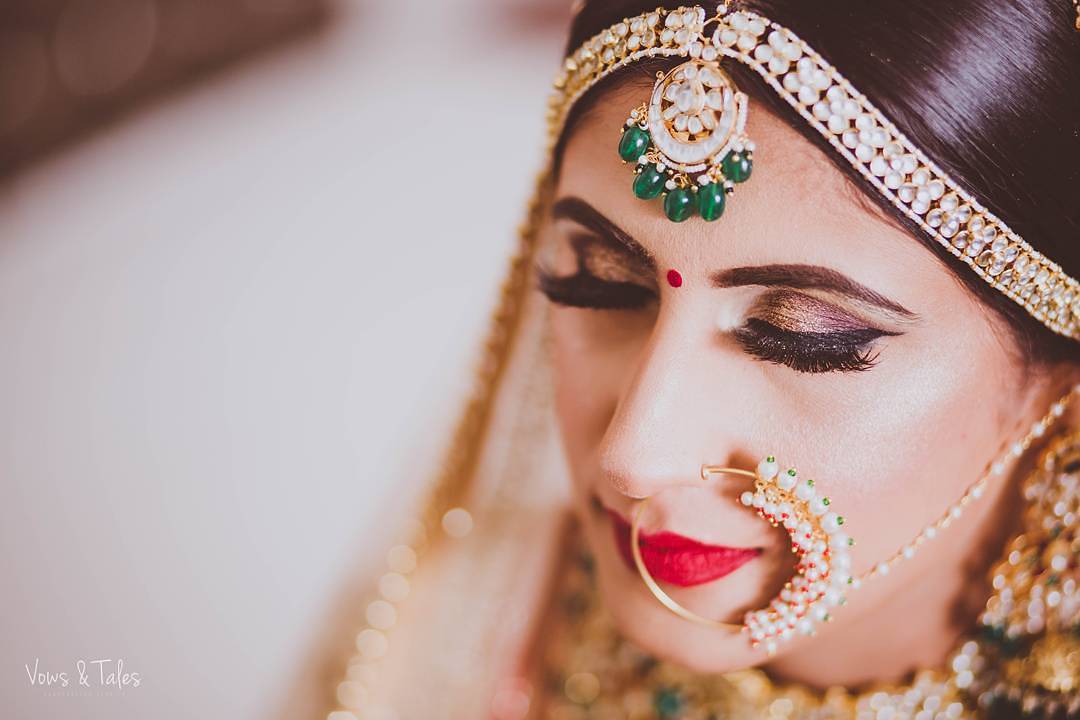


Beauty Basics!


Why? Not only does makeup sit better on the smooth and hydrated skin, those occasions where you go sans makeup (think “haldi” ceremony) get taken care of too!

Zero Makeup Tip – Get your eyebrows done at your regular place (a week before the D day) – for those perfectly mystic bride eyes.

Get your Basics Right!


That Glow comes from LOVE… and Makeup!


Everything rests on a strong foundation… including your make-up! I know you already know, but since you might be investing in a new (water-proof) foundation – I can’t but repeat – it’s all about covering your blemishes and achieving the perfectly toned skin. NOT about achieving a lighter skin tone!


Flawless Glow!


So ladies, be comfortable in your skin and get the accurate shade and brand that you must try for at least 2-3 months before your wedding day (we don’t want any unhappy surprises!)

Makeup Tips – On your D Day – use a gel foundation for its staying power!

Bridal Makeup Tips – Go Waterproof!
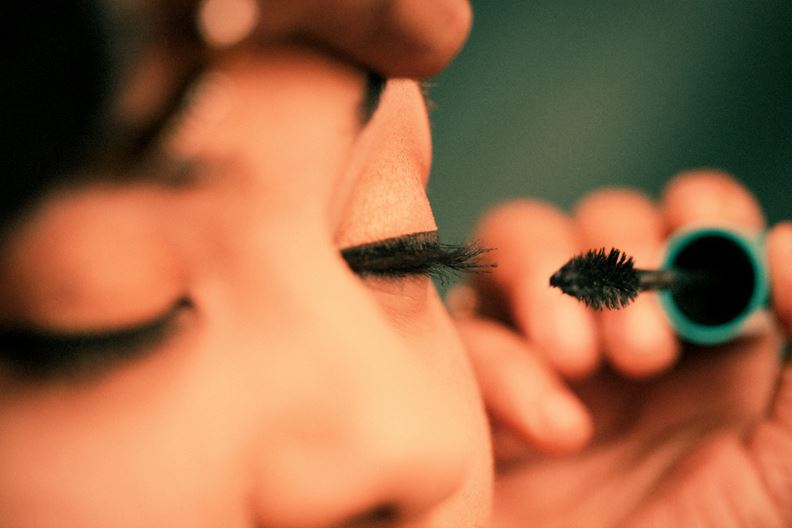


Beauty Lies in Those Eyes!


No matter how much of a bridechilla you are, be prepared to shed some tears! And you can’t ignore the threat of sweat under those strong harsh lights. So of course, everything has to be waterproof and smudge-proof! Right from your foundation to the last coat of mascara.


Stunner!


If your current makeup stash isn’t waterproof – invest in some new stuff that is. And do this month before the wedding day so you have time to try them all out.

Eye Makeup Tips
– Don’t use glittery eye-liners, not very photogenic! And no matter how much you love your kajal pencil – on the D day it is nothing but liquid eyeliner.

The Must Do for Every Bride – Makeup Trial!


Most make-up artists and hair stylists provide trial sessions for bridal makeup. Go ahead, and get yours done – and be 100% sure which look brings out the best in you! Also, ask your make-up artists about the brands she’s using on your skin, and if they’re not your regular brands – a trial will help you avoid any breakouts or blemishes on your wedding day.

Makeup Trial Tips – Click your makeup trial pictures & note down the shades used!


Bridal Makeup Tips for The Perfect Pout!


Pretty Pout!


Your lips must be neither too bold nor too bland – they have to be just perfect! While the usual wedding colors are reds, pinks, and corals, you must match the shade with your outfit. And lip-liners are a must. Don’t be afraid to try nude shades if they suit your skin and face!

The Pop Pout Trick –Peel Off Lip Stains are the latest thing. Just apply-dry-peel-off and you’re good to go. They last super long too – but be sure to try it before so you know you like the look!


In Short…


Bridechilla!


These aside, rest well – late night fun can eat into your beauty sleep. And don’t panic – even if something goes wrong, you can always fix it (just keep your favorite top-up makeup stash & your BFF nearby)!

With these bridal makeup tips and tricks – you’re good to go! If any of you have a secret lifesaver makeup tip or trick – do share with us!


Wednesday, 20 September 2017

6 Different Types of Nose Rings –


The nose ring is one of the essential ornament for Indian brides during the wedding and picking up the right one can help you to give a flawless look. It is very important to pick up the appropriate type of nose ring according to your face shape as it has the power to add or decrease the glamour from your face. When it comes to a nose ring, there is no other woman except Rati who can explain us about, how to rock this trend. I tried to club different styles of nose rings which Rati has flaunted effortlessly.


1. Segment Rings:


Segment rings are generally for those who have high and broad cheekbones. Segment rings are the same which was carried by Sonakshi Sinha in the movie Dabangg. So, if you are the one with sharp and high cheekbones, we recommend you to use segment rings. These segment rings are one of the best rings that looks great on Rati’s face.


2. Dainty Studs:


People with a small nose should be extra cautious while selecting a nose ring. Dainty studs are the one for those who have a small nose. Dainty studs look absolutely good and subtle when worn over a small nose. A tiny diamond or a crystal ball is enough to make your resemblance a memorable one.


3. Embellished Chains:


The trend of embellished chains was rocked by Deepika Padukone in Bajirao Mastani. Embellished chains are for those who have an oval-shaped face. A running chain with a large ring on the nose is a great way to balance the oval shaped face. This is generally worn by most of the Punjabi brides. If you are carrying a sharara or Pakistani apparel, embellished chains are the best.


4. Half-Hoops:


For a woman who has a round face should opt for half-hoops style. This half circle ring will make your face look slimmer and stylish. A woman should wear the half circles as the arch shape of the nose ring can help to balance the chubby face of a girl. These days, there are several types and designs in half hoops, so you a pickup anyone among them. Rati you rocked this trend :*


5. Beaded Hoops:


Beaded hoops are one of the simplest yet stylish forms of nose rings which can be carried without any effort. This edgy beaded hoops can help to add volume to your thin and skinny face. These rings are heavy and can work well on a woman with a broad forehead and narrow chin.


6. Large sized Naths:


Loved Aishwarya Rai’s appearance in Jodha Akbar? Thanks to the largely sized naths which complimented Aish’s look equally. Largely sized naths should be preferred by a woman with a heart-shaped face as it helps to draw attention from the wide nose and a broad forehead. These are generally worn by brides from Rajputana family or other royal parties. Look at the way, Rati carried this royal attire along with a beautiful jewelry.


Monday, 18 September 2017

Dress to Impress: Groom Edition


For some, being fashionable is easy. They seem to always know just the right outfit to wear to any occasion. We may have a friend like this or we might be the friend. Then there’s those who aren’t super fashion savvy. But hey, it’s okay if you don’t always know what look to go for or how to go about putting it together. Not everyone attends fancy parties all the time or has a personal seamstress. Speaking of fancy, what about your wedding? Are you unsure of what look is appropriate for the groom what you should even be looking for? You’re not alone. It may not be often that you have to dress up this much so where do you even start? Read below for groom fashion 101.

Where to Start


You know you want to pick out a suit, but how do you start? Start doing some internet research to find places near you that specialize in formals for men. Finding the right shop is the absolute first step and an important one; the right place will have exactly what you need. Try to find one that has experience in weddings and if the fitting and alterations are done in-house. If you’re buying your suit, it’s much easier to have the buying and alterations all done in one place.

Here’s the thing about renting versus buying. Renting can always be seen as a bit of a risk, but it’s much more budget friendly than actually buying your suit. When renting, each store will have slightly different policies, so you’ll want to ask for details before deciding whether to move forward with it. For example, Men’s Warehouse has a rental policy where they ship your suit to you a week before your wedding day, or two days if you’re picking it up in store. That leaves you only that long to address any problems. However, they also have a policy that allows you to switch out any piece if it’s not fitting right.

Buying can be a more comfortable option if you have the budget because that suit is yours. You don’t have to worry about spilling anything on it or ripping it and now you have a suit you could re-wear for any dressy occasion. Again, money can be an issue here, especially if you’re trying to get a designer suit.

Buying can also enable you to get the outfit together on your own schedule. You can get your outfit altered and ready so that you have it ready to go for the big day long before the day actually comes.

What to Pick


When it comes to the actual outfit there are so many options to choose from that it can be overwhelming. Let’s break it down. First, you’ll want the suit to match the style of your event. Is your wedding more on the formal side? Then you’ll want to go with a full, black tie suit. These suits are very crisp and traditional. Is your wedding more laid-back, maybe rustic? If that’s the case, you may consider doing a standard men’s suit. These are the suits you see more commonly, like around the office. If you’re trying to go more casual you could also consider a vest with no jacket. This look has gained steam in the last few years and can still be formal and stylish without being too dressy. It’s also a more comfortable option in warmer outdoor weather.

What Accessories


Accessories matter, but what kind of accessories should you be pairing with your look? To start, you should understand what’s available.

As far as your neck goes and to keep it simple, you have two reasonable options: a tie, or bowtie. Now, even getting into these two categories can be overwhelming. First of all which do you choose? It’s important to keep in mind the feel of the event. A bowtie in a solid shade can be considered very formal. Of course, this can be less so if the bowtie is a funky pattern or color. Regular ties are versatile, which is nice because you really can’t fail. Your tie can help you lean ultra-fancy or more laid back.

Pocket square or no pocket square, that is the question. Accessories always add something so it’s important to consider whether your suit is “busy” or not. Is it patterned or are you planning to feature a patterned tie? Then a pocket square may be too much. However, in some cases where the suit is very simple, that pocket square can add the pop of color your outfit needs.

Jewelry—mainly watches, tie clips, and cufflinks—is pretty standard when it comes to grooms’ outfits. It’s up to you whether you want to add this bling. A nice watch can set off a suit very nicely. When it comes to deciding what to wear and what to leave out, decide how much is too much. If you’re putting on a bunch of these pieces and it looks a little busy, consider foregoing something.

There are other not so common accessories that may be right for your day. A lot of grooms express their goofy side with crazy socks under a formal suit. You don’t have to; you can always wear sensible socks if that’s more your style. Not as fun, but much more formal and traditional. Suspenders are another way to personalize your look. This is an especially great choice if your wedding is somewhat casual and maybe rustic or vintage themed.

Now that we’ve gone over some of the style basics, you can go forth into the groom’s fashion world with confidence. Hopefully you’re not completely overwhelmed. It can seem like a lot when you’re first getting started, but if you take it step by step and find some knowledgeable retail workers to help you, you’ll be just fine. If all else fails to ask for help! There’s bound to be someone around you who knows the ins and outs of men’s fashion. Don’t forget your partner too. They may be able to offer you helpful insights and opinions that lead you to your best look.


Source

8 Wedding Makeup Tips & Recommendations That Will Never Go Out of Style


Weddings are arguably the most photographed events most of us will attend in our lifetime. Whether you’re getting married or in the wedding party, you’re going to have phones, cameras and video cameras pointing at you all day.

With that in mind, we know you want to be confident in how you look—both on that day and twenty years from now when you’re reminiscing. We’ve got you covered with plenty of tips, tricks, and recommendations to look your best. Below, Christine Walsh, an esthetician and makeup artist at Dermstore Spa & Salon in Hermosa Beach, shares with us her best makeup tips for brides.
Timeless Bridal Makeup Tips and Recommendations

Whether you’re going to be doing your own makeup or hiring a professional, these tips are essentially universal. Here’s how to create a timeless, flattering and photo-ready look.

1. Enhance your natural beauty.


When you’re surrounded by loved ones on your special day, you want to look and feel like the best version of yourself—not someone unrecognizable. “Makeup is a tool to enhance one’s natural beauty,” says Christine, “not a mask to make you look like someone you are not.” To put this into practice, ask yourself what your favorite facial feature is—eyes, cheekbones, lips?—and then use makeup to define and enhance that feature. Easy confidence boost!

2. Save the trends and experiments for another day.


We love playing around with new products and colors as much as the next girl, but a wedding is “not the day to try a bold lip or blush on a whim,” Christine says. Save the fun new lip color for your honeymoon.


3. Stay away from heavy, creamy products.


For staying power and the ability to photograph well, Christine advises against heavy creams and foundations. “If you are feeling dry,” she says, “try a hydrating serum or a gel-like moisturizer on the day of the wedding.” If your skin is more on the combo-to-oily side, she suggests, “a mattifying primer to cut back on the shine that can develop as the day goes on.”

4. Opt for waterproof mascara and eyeliner.


Tears, sweat, and rain (knock on wood!) are the enemies of a finished makeup look—and these can all be commonplace at wedding ceremonies and receptions. Avoid dealing with the dreaded raccoon eyes by choosing long-lasting mascara and eyeliner.

5. Stick to a neutral-colored lip.


Christine recommends choosing a light pink or a peachy nude lip color to keep your look fresh and timeless. She also strongly suggests choosing a lip stain over lipstick or gloss for its superior staying power.

6. Never neglect the eyebrows.


“Even if you don’t fill them regularly,” says Christine, “the power of a good brow truly is the foundation to your facial feature framing.” A little color and grooming will go a long way!

7. Lock in your look with setting spray.


Once your makeup is picture perfect, make sure it stays that way all day (or all night) long with a good setting spray.

8. Keep a touch-up bag nearby.


Christine recommends storing blotting powder/papers and your lip stain within the bag to touch up your look if necessary. Ask one of your trusted bridesmaids to hang onto it for you during the day.


Bonus Tips (If You’re Hiring a Makeup Artist)

If you’re getting your makeup professionally done, here are a few extra tips to ensure your makeup artist creates a look you’ll be more than happy with.

1. Schedule a makeup trial at least three weeks before your wedding.


This will help you try out a couple of different looks, if you’re unsure, as well as work out any kinks before the big day. Christine suggests scheduling a trial during the day and taking pictures in natural lighting to get a better idea of the finished look.

2. Be sure to tell your makeup artist about any specific concerns or ideas.


If you have skin concerns (oiliness, dryness, sensitivities), allergies or specific ideas about your look, tell your makeup artist ahead of time to ensure a smooth trial and session on the big day.

3. Ask the makeup artist about their process for the wedding day.


Does the artist work out of a salon, or would they be able to travel to you? How long would the makeup-application process take? This will help you with scheduling your getting-ready time on the day of the wedding.


Best Bridal Makeup Artist in Lucknow.
Best Beauty Salon in Lucknow.


Source

Friday, 15 September 2017

10 Steps To Do Flawless Makeup At Home To Rock At Any Wedding


How many of you love getting ready for a wedding or a party or any other special occasion? And, how many of you get confused as to what comes first– eye makeup or foundation, eyeliner or mascara? Don't worry (READ: Worst Makeup Mistakes). We are going to guide you, step-by-step on how you can do your makeup at home for occasions like weddings.


Step #1


Begin with skin care and then use primer


Make sure that you are using your regular moisturiser and allowing it to seep into the skin, at least 15 minutes before moving on to a foundation. After moisturiser, and before foundation, I would strongly recommend using a face primer. A primer makes your foundation last longer. It acts as a barrier between your skin and the foundation.

Step #2


Move on to the Foundation


Now, the moisture and primer will make the application of your foundation very smooth. So, apply a good foundation of your choice- powder, liquid or cream. Make sure that you set the liquid or cream foundation with a loose powder so that your foundation stays all through the day.

Step #3


Time for the eyeshadow


Remember, your eyes should not 'match' your outfit; it should ‘complement’ the colours on your dress. Use colours that are opposite of the colours on your dress. The key to applying eyeshadow is using a flat eyeshadow brush, and then a fluffy dome-shaped brush to blend. Make sure you apply a darker colour in your crease and follow it up with a highlighter up to your brow bone. This softens any harsh lines that could be visible to the naked eye.


Step #4


Kajal, followed by the eyeliner


Apply a black, brown, blue or green coloured kajal in the waterline and then line the lash line with black eyeliner. You could use a pencil, gel or liquid liner– whichever you feel comfortable with. Indian women look great in a winged liner. But, never ever think of complementing your smokey eye with red lips! It is always ‘smokey eyes with nude lips’ or ‘bright lips with nude/neutral eyes’.


Step #5


Time to curl your lashes and apply mascara


Remember, always curl your lashes first and then apply mascara. If you do it the other way round, your lashes are going to break. While, an eyelash curler is the most underrated makeup product, using a curler can make your eyes look ‘awake’. Apply mascara from the roots of the lashes, and wiggle the wand in a zigzag motion till you reach the tip. This will add definition and volume to your lashes.

Step #6


Moment to add some blush


For a natural looking glow, apply blush on the apple of your cheeks with an upward movement going into the hairline. The best way to judge where the blush needs to be applied is by smiling in the mirror, this way, you will get to know the high-rise points of your cheeks. Use a big fluffy brush to blend the blush on the cheeks.


Step #7


Contour and highlight


Next, use a brown matte shade which is two shades darker than your skin colour to contour your cheeks. Suck in your cheekbones, notice the hollows and apply the contouring powder there and blend. No lines must be visible. To highlight, apply a shimmer blush or powder on the high plains of your face, which are the T-zone and cheekbones. The idea of applying a highlighter is simple– when light falls on any of these areas, your skin is going to give out a sheen which looks amazing, especially in photographs.

Step #8


Line your lips


Before you begin with your makeup, make sure that you have applied some lip balm. This will keep your lips moist and will allow your lip liner and lipstick to glide on easily. Remove the lip balm with a tissue and line your lips with the help of a lip pencil. Lip liners are brilliant as they act as a base for your lipstick! It is a good idea to fill the entire lip with the pencil before you move on to your lip colour.

Step #9


Apply your lip colour


Run your lipstick over the base coat, then take a tissue and place it on your lips to remove the smudges. After this, run some loose powder with a brush, over your lips. This will make your lipstick last much longer! After this, apply another coat of the lipstick and gently press a tissue over. Now you can eat or drink anything, your lips are not going to lose their colour!


Step #10


Get ready to smile

Now that you have followed all the steps, walk with confidence and do not forget your million dollar smile! Don't worry if you have not followed a certain step to the T, just remember the key to look gorgeous is to be confident and happy.


Best Bridal Makeup Parlour in Lucknow.
Best Beauty Salon in Lucknow.


Source

Tuesday, 12 September 2017

7 Attractive Makeup Tips For Different Lip Shapes


Lip makeup is vital! It brings our whole face makeup together and offers a proper definition to the face.


But lip makeup does not come in a one shape fits all format! We all have different types of lips—some of us are blessed with fuller lips while others have thin lips. Whether you have thin, even or fuller lips, makeup has the power to make them appear more beautiful and well accentuated. Today, we decided to dedicate a makeup lesson on the different lip shapes and how to do makeup to bring out the best in each of one of us.

Let us have a look at attractive makeup tips for different lip shapes:

1. Top Heavy Lips:


Majority of Indian women have top heavy lips. Effective makeup tips and tricks can easily make top heavy lips appear even and beautiful.

Makeup for top heavy lips is simple:

Start by lining your lips from the center of your lips to the outside by following your natural lip shape.

  • Then, apply a bright lipstick on the bottom of your lips and a slightly darker tone of the brighter lipstick on the top to create an illusion of smaller space to give a smaller lip look.
  • You can also apply the same lip color on the upper as well as lower lips and then apply a dab of white pencil or eyeshadow to the center of the lower lip to achieve balance, evenness and fuller look.
  • Another trick to follow to make heavy lips appear smaller is to use a lip pencil and start filling your lips just inside the natural line and then finish it off with lipstick.
  • The simplest trick to make fuller and heavy lips appear smaller is to use a dark toned lip color as it will reduce the prominence of fuller lips


2. Bottom Heavy Lips:


Bottom heavy lips are actually pretty and attractive! But some women look to hide that pout!


Here’s how you can make bottom heavy lips look better:

  • The simplest trick to even out bottom heavy lips is to use the same lip color on the upper as well as lower lips, and then apply a dab of a white pencil or creamy nude matte eyeshadow only to the center of the upper lip to achieve balance, evenness and fuller look.


3. Uneven Lips:


If your upper and lower lip shape and size do not match, then you have uneven lips.

Here are a few tips to manage uneven lips:

  • People with uneven lips should use a lip pencil to outline your upper lip, making both the sides of the upper lip match up first and then follow the same for the lower lips.
  • Then, smudge the lip liner with a very light hand to eliminate any rough and hard edges to achieve a natural finish.
  • Be careful with this trick! The lip liner has to be drawn with a very light hand and blended well otherwise it might turn out to be unflattering.


4. Flat Lips:


Flat lips have no dimension or depth and appear very flat without a prominent outline. It is the best choice to use light and softer lip colors for people with flat lips as dark lip colors will make lips appear very flat and small.

Flat lips can be given a good shape with this trick:


  • Start by outlining your lips slightly outside the natural lip line of your lips.
  • Shimmery and frosty lip formulas work well on thinner and flatter lips as it adds a fuller and plumping effect.
  • Ombre lip effects also work well on thinner and flat lips.
  • Start by filling the outer corners of your lips with a dark lip color and fill the center of the lips with a soft or bright lip color to create a gorgeous ombre lip effect.
  • If you are not ready to sport ombre lips, you can apply the same lipstick color all over your lips and then add a shimmery highlighter to the center of your upper as well as bottom lips to create a plumper lip appearance.

5. Thin Lips:


Thin lips require more dimension and space.


  • And we have just the trick for you to make your lips look absolutely stunning:
  • Start by applying lip liner slightly outside your natural lip line and then softly smudge it.
  • Then, apply a darker lip color to the lower lip and softer lip color to your upper lip and blend everything together with a clean lip brush.


6. Overlarge Lips:


Overlarge lips have the power to dominate the whole face. So, always choose softer lip colors with a rich matte consistency to keep your lips appear soft and even.

Here’s how you can draw attention away from overlarge lips:
Try nude lip.
It is best to do a heavy smokey eye or a highlighted cheek area for face makeup to carry away attention from the overlarge lip size.

7. Small Lips:


Small lips look cute on some but most want to have that lovely pout.

Follow these tips to make small lips look more prominent:

  • You can apply shimmery, frosty and glossy lipstick formulas which will add fullness to the small lips.
  • Do not apply very dark lip colors as it will make lips appear smaller.
  • Choose brighter and softer lip colors to accentuate your lips the best way.
  • Lip makeup definitely requires practice. Study your lips by standing in front of the mirror and try these tricks and tips.


Did you find this article useful? Which lip shape do you have? Let us know in the comments section below.


Wedding Makeup Artist in Lucknow.
Professional Bridal Makeup Artist in Lucknow.


Source

Top 12 Scrubs For Removing Blackheads


When skin pores are clogged with oil or debris, blackheads are formed. And when this material oxidizes, it turns dark making your skin look discolored and uneven. The worst part is that this discoloration is extremely prominent and looks rather unsightly!


It is but obvious that you wouldn’t want these on your face. To banish these blackheads and for a clear complexion, you should use a facial scrub. Below are few facial scrubs that work wonders for removing blackheads. These products work very effectively to offer clear and soft skin.

We have chosen the top 12 scrubs that act well on blackheads.


The Best Scrubs For Blackheads


1. The Body Shop Tea Tree Blackhead Exfoliating Wash


  • This scrub contains tea tree oil, which has anti-bacterial effects and all natural abrasive agents to slough off dead skin cells.
  • It contains standard detergents which help lift away dirt and oil, while natural moisturizers like herbal oils moisturize skin surface.
  • This is slightly expensive though works miracles to remove blackheads.


2. Clean And Clear Blackhead Clearing Scrub


InStyle magazine states that Clean and Clear Blackhead Clearing Scrub is the best skin exfoliator. It was also featured by Elle Girl magazine, stating that it works fast on blackheads.


  • Clean & Clear Blackhead Scrub contains gentle plastic beads to exfoliate pores and skin surface and oil lifting salicylic acid that helps in treating acne breakouts.
  • The tiny beads reach the deep pores and cleanse the skin naturally.
  • This scrub is very creamy in texture.
  • Apart from being very effective, this is very easily available in your local stores and quite affordable.

3. Neutrogena Deep Clean Blackhead Scrub


Neutrogena Deep Clean Blackhead Eliminating Daily Scrub is oil-free, non-comedogenic, and doesn’t block skin pores.


  • It contains micro beads to soothe your skin without drying out.
  • The beads reach deep into the pores and cleanse it well along with exfoliating dead skin cells very effectively.
  • It also is suitable for all skin types.
  • It is mild and contains tiny granules that reach each of the pores deep inside and cleans them effectively.
  • Many people have found it works very well, and thus, it is highly rated as well.
  • This scrub is not very harsh on the skin; it’s gentle
  • It leaves the skin smooth and soft without drying up.

4. St. Ives Blemish And Blackhead Control Apricot Scrub


St. Ives Blemish and Blackhead Control Apricot Scrub is a very good product for acne-prone skin.


  • It removes blackheads very effectively owing to its antioxidants and vitamin C rich apricots.
  • This product also contains 2% salicylic acid like DHC acne wash.
  • Ingredients such as cornmeal and walnut also are included in this scrub, which is known for better cleaning or scrubbing activity.

5. Fab India Neem Tulsi Face And Body Gel Scrub


  • This scrub is made out of natural ingredients.
  • It has a very refreshing smell to it.
  • It’s a gel-based scrub which is perfect for all skin types.
  • They are no breakouts with this scrub.
  • This scrub helps in removing the blackheads leaving the skin smooth and glowy.
  • It does what it claims and is pocket-friendly too.

6. Garnier Pure Active Blackheads Uprooting Scrub


  • These granules are not very harsh.
  • This scrub has cooling properties like menthol which is cool in the summer season.
  • This scrub helps in removing the blackheads easily with regular use
  • A little goes a long way with this scrub.
  • It’s easily available and has a very reasonable price

7. VLCC Skin Defense Indian Berberry Face Scrub


  • This scrub is creamy in texture with very small granules.
  • It’s good for all skin types.
  • It is an Ayurvedic scrub, and it’s gentle on the skin.
  • The fruity fragrance is very nice; it makes you feel fresh.
  • This scrub helps to remove blackheads as well as it keeps the skin smooth.

8. Aroma Magic Mineral Glow Scrub


  • This scrub helps in removing both blackheads and whiteheads.
  • The scrub is a good cleanser and removes all the dirt from your face.
  • This scrub is not very harsh, and it can be used by all skin types easily.
  • It’s creamy in texture.

9. Himalaya Gentle Exfoliating Walnut Scrub


  • It has a nutty smell.
  • This scrub is good for removing blackheads on your face and is not harsh on your skin.

10. Biotique Papaya Scrub


  • This scrub is creamy and thick in texture.
  • It leaves the face clean while removing all the dirt and blackheads.
  • It also helps in removing acne marks.
  • This one tube can easily last for about six months.

11. EverYuth Naturals Walnut Scrub


  • The Walnut particles act as a scrub. Walnut benefits your skin and body a lot.
  • This scrub makes your skin feel smooth and soft after every use.
  • It removes dirt, oil, and blackheads easily.

12. Queen Helene Mint Julep Masque


Queen Helene Mint Julep Masque isn’t a scrub but a mask. We have mentioned it here because it’s truly a must have product for people with black and whiteheads.


This product is known to clean the skin pores deeply and reduce their size.
It helps in skin tightening as well.

But the main problem is that it is not available in India. However, if you have relatives in the USA, then you are lucky! Get one shipped or brought over as soon as possible.

Hope you found this list helpful. Did we miss out any of your favorite blackhead scrubs? Do let us know in the comments section below.