Thursday, 31 August 2017

How to Get the Perfect Summer Party Makeup Look


The perfect summer party makeup look consists of five key elements: a mattifying primer, foundation with SPF protection, long-lasting eye color, shimmery bronze cheeks and a soft, supple pout. By adding these things into your summer makeup look, you’ll be selfie-ready, whether competing in your neighborhood grill-off or celebrating the Fourth of July with family and friends.

See below for two summer party makeup looks and try them on virtually in our makeover room by clicking the model’s picture.

Natural Summer Party Makeup
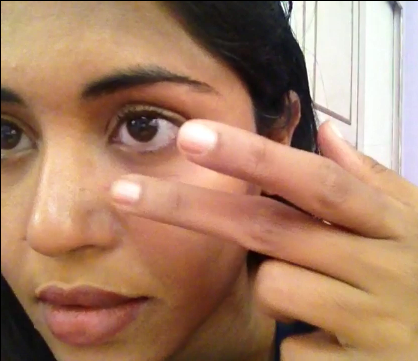


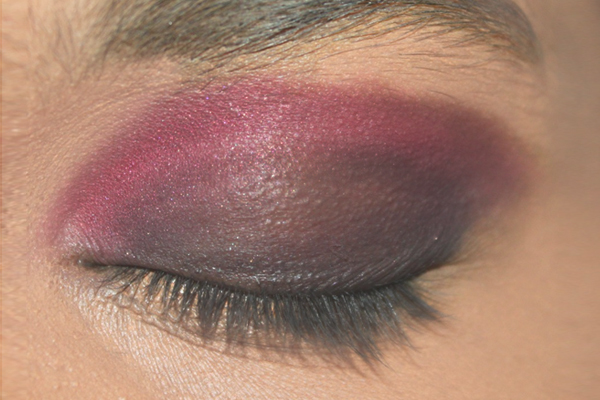
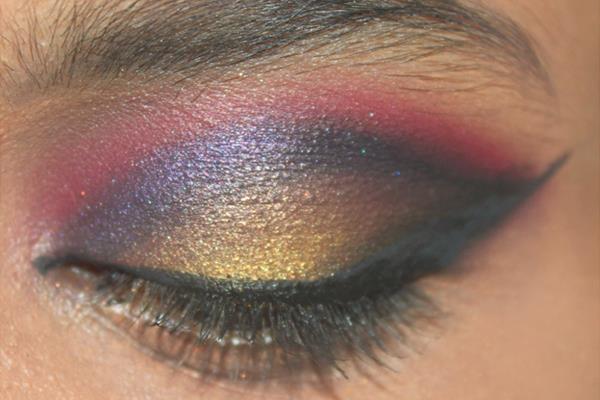
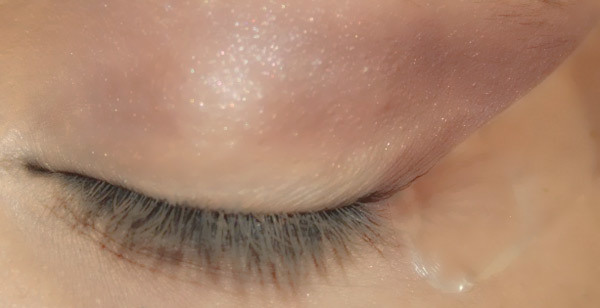
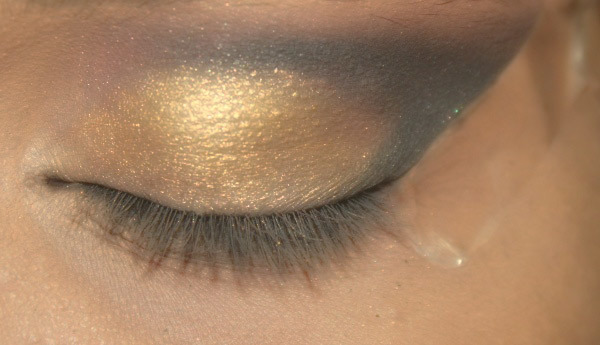
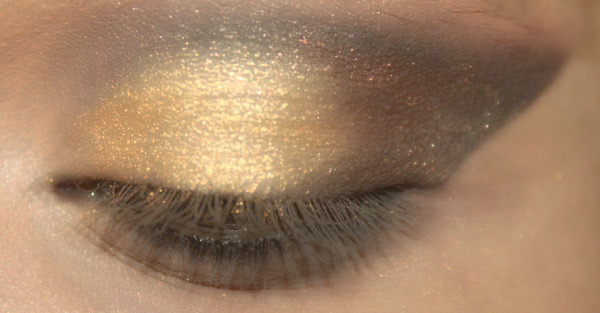
  • Using the Eye Shader Brush apply the Cream shade from the Perfectly Nude Eye Shadow Kit on your eye lid, brow bone and inner corner of your eye.
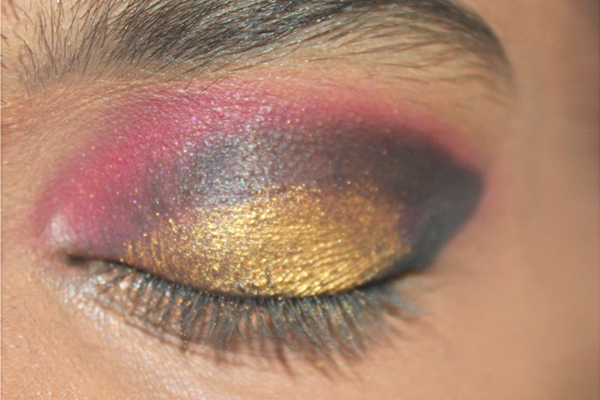
  • Using the Chisel Shader Brush, blend the Antique Gold shade from the kit onto your lid, as well.
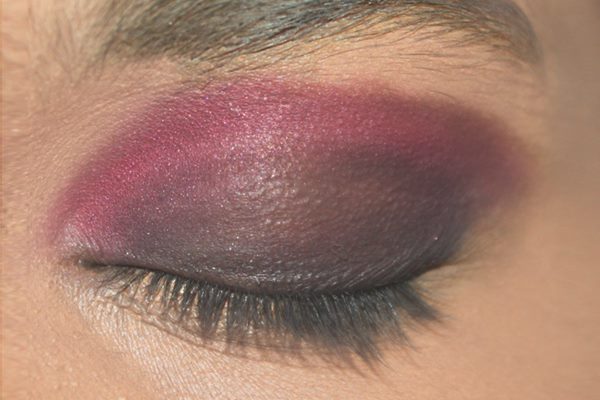
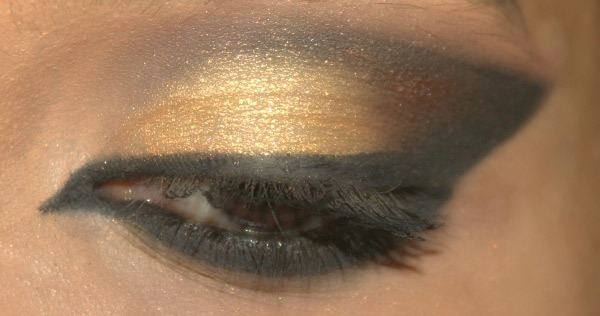
  • With the Crease Brush, apply the Copper shade from the kit to your crease and outer corner of your eye.
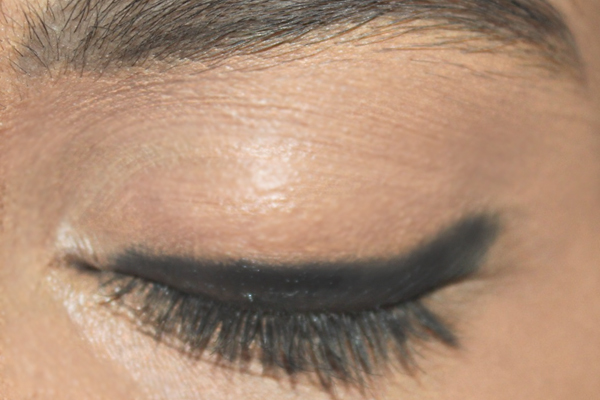
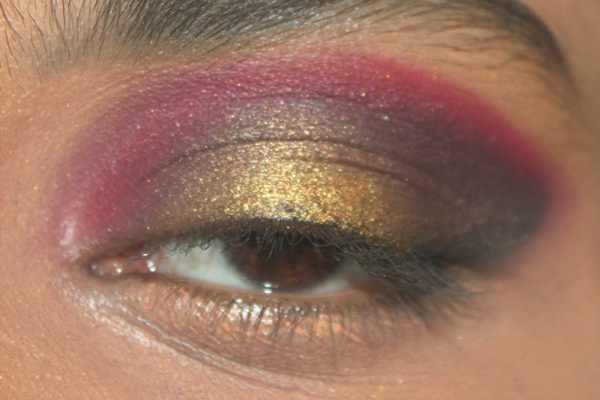
  • Apply Basic Brown Eye Pencil to your top lash line and Taupe Eye Pencil to your bottom lash line.
  • Finish by layering the gloss end of the Lip Fixation on top of the stain.
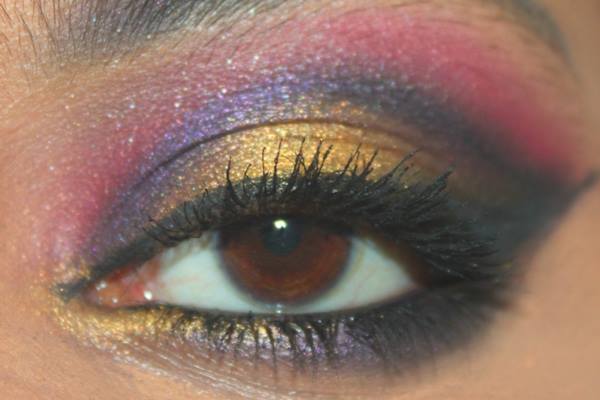
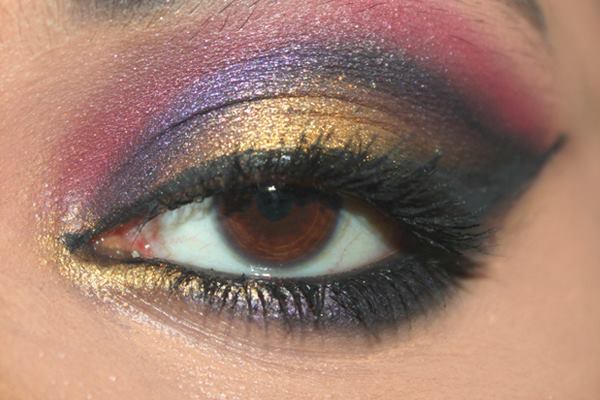
  • Fourth of July Party Makeup Look


  • Apply Smooth Affair for Oily Skin Facial Primer and Dream Tint Tinted Moisturizer in your shade to your entire face.
  • Swirl the White Fan Brush in either Mystique PurePressed Blush or Sunbeam Bronzer and apply to the apples of your cheeks.
  • Dab a small amount of Champagne Silk Eye Shere Liquid Eye Shadow on your hand and apply it to your eye lid using the Sculpting Brush. This will give your eye shadow a long-lasting base.
  • With the same brush pat Blue Hour PurePressed Eye Shadow into your crease and outer corner of your eye lid.
  • Line your top lash line with Black/Grey Eye Pencil, starting at the inner corner and extending outward in a wing.
  • Apply PureLash Extender and Conditioner to your lashes.
  • Line and fill in your lips with Terra Cotta Lip Pencil.


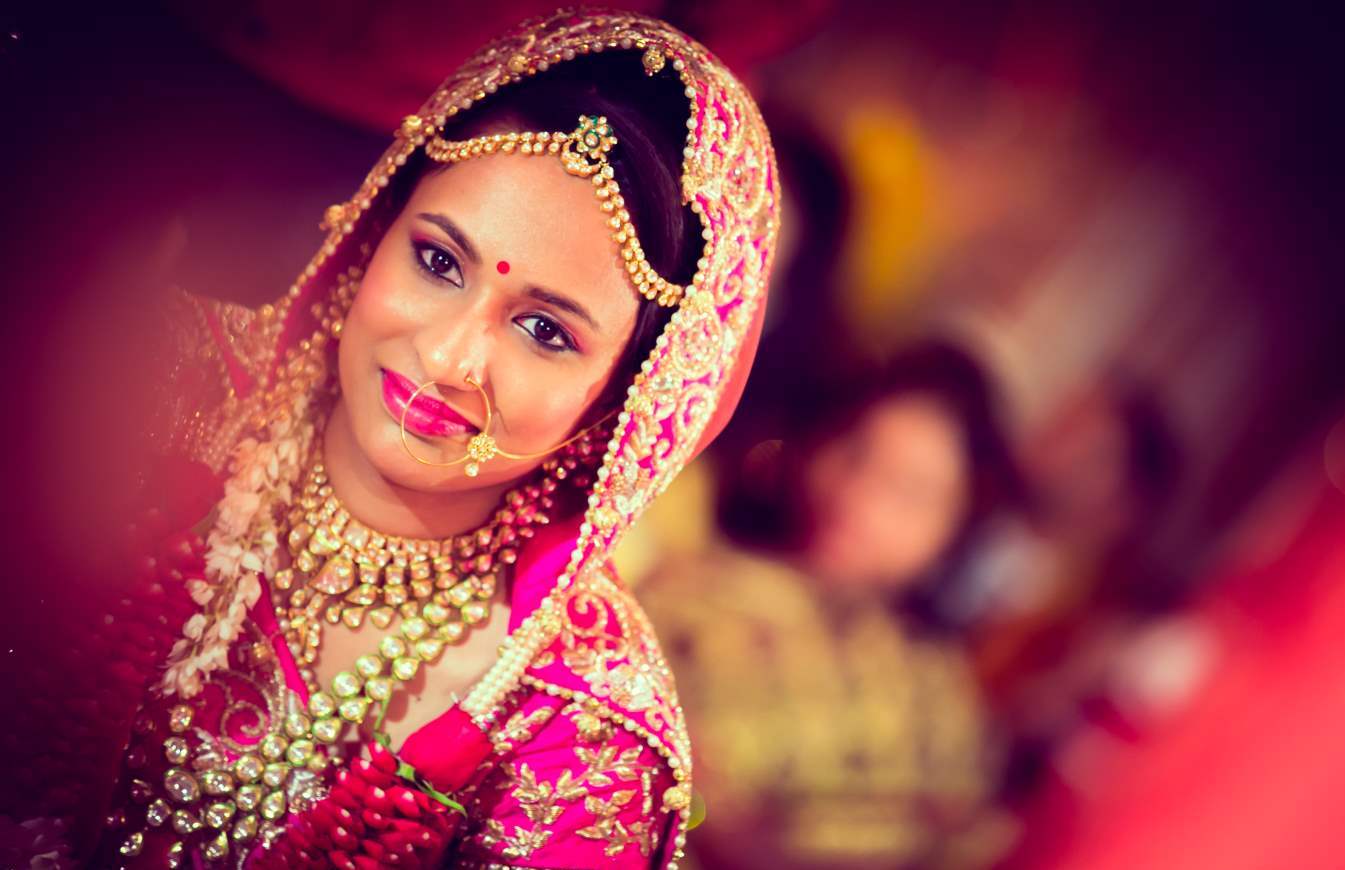
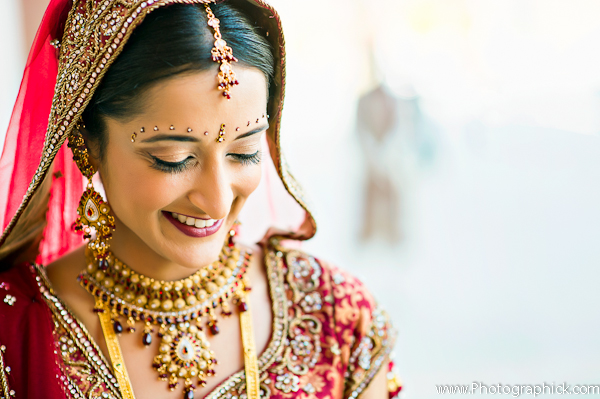
Best Unisex Salon Makeup Services in Lucknow.

Best Makeup Services in Lucknow


Source

Wedding Day Makeup Advice and tips


Wedding Day Makeup Tips And Advice


Your wedding day is going to be one of the most memorable days of your life. You want to look and feel the beautiful, radiant bride with your makeup enhancing your natural beauty. Your every blush, smile and kiss will be recorded on film so your bridal makeup needs to be picture perfect and look flawless all through your big day. This guide to wedding makeup will take the stress out planning your wedding makeup.

Wedding makeup advice:


Prepare your skin for your wedding day Unfortunately many women wait until they are only a few months away from their wedding day before they even begin to give any thought to skin care. Start early and take care of your skin now. You will need to work out your skin type to help you establish a proper skin care regime. This, combined with good eating habits, drinking plenty of water, getting enough sleep and regular exercise will ensure that your skin will be radiant on your big day.

For help understanding your skin type and how to develop a quick and easy skin care routine please read Khush’s article; Great looking skin – A simple 4 step skin care guide.

Wedding makeup tip: Beware facials!


Unless you have facials on a regular basis DO NOT get one the week before your wedding day. Facials can pull impurities to the surface, and you do not want to break out the week of your wedding. To also help avoid blotches and blemishes do not make any major changes in your skin care routine during the few weeks before your wedding. The weeks before your wedding is not the time to experiment with your skin care. If you regularly get facials have your last regular facial a good week before the wedding.

Wedding makeup tip: Pimples and acne.


If you do have a breakout, do not pick. Do not do anything that can irritate or redden or enlarge the problem. Use pure Aloe Vera to treat any bumps or breakouts. It is a wonderful healer.

Wedding makeup tip: Keep away from too much sun.


Don’t get too much sun before your wedding. Sunburns, peeling skin and tan lines can sabotage your special day.


Wedding makeup advice: Use a professional makeup artist or do it yourself?


If you are confident in applying your own makeup there is no reason you can’t do your own wedding makeup. If you are not so confident with your makeup abilities your wedding makeup is not the time to experiment – you want to look your absolute best on the day and your wedding photos will be your lifetime mementoes of your special day. If you are unsure of your makeup abilities, or just want the peace of mind of not having to worry about your makeup, use a professional.
Either way, read on – I’m sure you will find the following tips and advice useful.


Wedding makeup advice: Things to consider when planning your wedding makeup.


You will want your makeup to be appropriate for the time of day, the venue (indoors or outdoors) and complement the style of your wedding dress so once you have confirmed the arrangements for your wedding day, and you have decided the style of your wedding dress, you can start to think about the style of makeup you prefer. Things to consider include;


Night time or day time wedding?


Night time weddings are typically more formal than day time weddings. For a night time wedding considers a more sophisticated makeup look. For a day time wedding makeup tends to be more natural.


Indoors or outdoors wedding?


Outside lighting is stronger so your makeup should be softer and more natural than makeup for an indoor wedding.

The lighting.

Different lighting requires different makeup styles. Night time lighting tends to dull makeup so a stronger makeup look is preferable. Natural and day time lighting is more generous to make up so, again, consider a more natural makeup look.

The colour of your dress.

Ivory and off white tend to make the skin look softer and can, therefore, support a more glamorous makeup style. White tends to look strong and washes out most faces so consider using softer colours to enhance the face.

The style of your dress.


The stronger the neckline of your dress the more sophisticated the hair and makeup style will need to match the dress’s style. A neckline that cuts deep and is off the shoulders will look great with a hair up hair style so that the line of the neck and shoulders is shown off. Consider also the length of the dress, the shorter the dress the more simple the hair and makeup should be. Remember you are creating an entire picture, do not wear a beautiful dress and stylish heels and then wear your hair and makeup like you do when you wear your jeans. Don't sell yourself short on such a memorable day.

Wedding makeup tip: Give yourself plenty of time to organise your makeup.


Before you meet with a makeup artist or purchase any makeup, take some time to go through bridal magazines and pull out makeup styles that you really like and some you don’t like. Armed with your bridal magazine cut outs and a picture of your wedding dress book an appointment with your makeup artist for a trial run or a consultation at your cosmetics counter. Don’t do this at the last minute. Make sure you have a good couple of weeks up your sleeve so you have time for a couple of sessions if you don’t settle on a preferred style and colours first time up. Once you have your makeup look sorted to make sure the makeup artist or beauty consultant writes everything out and notes any makeup items you may not have that you need to purchase. If you are doing your own makeup have a couple of dry runs well before your big day so you have the makeup style and look perfected well ahead of time.


Wedding makeup tip: Be yourself


You want to look sensational but remember you want to look like yourself and feel comfortable with your appearance. You can look great and stay within your comfort zone. You want your husband to be to recognise you when you walk down the aisle. Plan ahead and give yourself time to find the makeup look that you love and feels comfortable.

Wedding makeup advice: Purchasing or selecting your makeup.


Now you have settled on your makeup style here are some tips and advice on your specific makeup requirements:

Foundation: Sort out your foundation well ahead of time. The key to successful wedding makeup is perfect looking skin. Make sure that your foundation matches your skin tone exactly and doesn’t look mask like. Give yourself plenty of time to experiment and find the perfect foundation for you.

For help selecting your foundation please Donna’s article; Choosing and applying foundation – A simple step by step guide.


Wedding makeup tip: Highlight one facial feature


You know your best facial feature; your plump rosy lips, your beautiful eyes or your lovely check bones. Your makeup should highlight your chosen feature. Don’t try and highlight more than one feature, it will look “too much”. If you use a bold red lipstick to highlight your beautiful lips go low key with your eye makeup. Conversely, if you choose a stunning smoky eye look to choose a more subtle lipstick or lip gloss.

Wedding makeup tip: Watch out for “seemed a good idea at the time”.


Watch out for fads; in 20 years time hot pink lipstick will date your wedding photos. You want to look as classic as possible so that your photo memories are timeless.

Blush: Become a truly blushing bride by choosing a warm flattering cheek colour in a pinky peach or rose or, if you tend to get flushed, a brownish tone. Experiment and find the blush colour that suits your skin tone. Use a powder based blush, they will usually last longer than cream blushers. To apply blush, start at the hairline by the middle of your ear, blend forward to the front of the cheek, and then back to the hairline and upwards. For a perfect application find a blush brush that is the size of the apple of your cheek. After the initial application dust, the blush with some loose powder and then apply a touch more blush to the front of the cheek.

Lipstick or Lip Gloss:


You will be doing a lot of kissing on your wedding day so you will need a lip colour that will last. Use a matte or long-wearing lipstick or lip gloss because you don't want to be constantly touching up your makeup during the day. Be sure to use a colour that complements your hair and eye colour and use a lip liner in the same colour family as your lipstick or lip gloss. Don’t use a lip liner much darker than your lipstick or lip gloss. This technique looks harsh and very unnatural in pictures. Purchase the lipstick or lip gloss and lip liner to keep in your purse for the whole day. Wedding makeup tip: Smallish lips If your lips are naturally small the lighter the lip colour the fuller the lips will seem.


Wedding makeup tip: Makeup remover.


Be sure to have makeup remover ready for any accidents. As you know makeup doesn't just wipe off, especially not of a beautiful white wedding gown. Makeup wipes are a convenient way to keep makeup remover handy.

Eye shadow:
For help selecting and applying your eye shadow please read Khush’s article; Beautiful eyes made easy. If you are considering smokey eyes please Khush’s article; A step by step guide to sexy smokey eye makeup.

Wedding makeup tip: Eyebrows.


Properly groomed and shaped eyebrows help enhance and add expression to the face. Have your eyebrows groomed but do this a week before the wedding in case you get a few red bumps after plucking or waxing. Fill in your eyebrows, if needed, with an eyebrow pencil shade that's slightly lighter than your eyebrows. Brush through with an eyebrow brush or a clean toothbrush for a more natural look.

Mascara: For extra lush looking eyelashes use an eyelash curler before applying your mascara. Prepare for those tears of happiness by using a good waterproof mascara. Apply two coats, let the first coat dry before applying the second coat. When you purchase your waterproof mascara make sure that you have an eye makeup remover that also takes off waterproof mascara.

Finishing Touches: When you have finished applying your makeup you may want to apply a little more blush, and then finish with a final brush of loose powder.


Wednesday, 30 August 2017

Top10 Beauty Tips for Face


                  Best Beauty Parlour in Lucknow.


Let us reveal the “Top 10 Beauty Tips for Face“.


In today’s competitive world every one of us dreams of having a beautiful, smooth, soft and clear face and skin, without any discrimination of a male or female.

Why are you concerned about your skin? And why you spend a lot of bucks for a spotless glowing face? Because face and skin both indicate how healthier, good looking and younger you are, in front of others as well as for your self-confidence.

Do you crave to have a skin like the celebrities?


There are thousands of skin care products available in markets, claiming every solution to your skin problems. But to be very honest, does your skin really deserves chemicals of all sort? We are determined and working 24/7 to provide you all homemade natural remedies for all ailments. Since your health and beauty is the top priority for us.

According to a famous saying


Every affliction can be treated by Nature except for Death

To follow that golden rule, here are the ” Top 10 Beauty Tips For Face ” in particular and for skin in general.

No: 1 Beauty Tips for Spotless Face Lemon Juice


Lemon is a citrus-rich fruit and has to cleanse, lightening dark spots and smoothing properties for our skin. Contains enzymes to remove dead skin cells. Best cleanser for those who have oily skin. Lemon juice is a natural astringent to make our skin less oily, leaving it smooth and soft.

To get rid of dark spots and for having smooth skin you have to
  • Squeeze a fresh lemon juice with squeezer or hand ( only for face and neck )
  • Apply squeezed lemon juice onto your face and neck where you are having dark spots
  • Let it on for at least 10 minutes
  • Wash out with lukewarm water
  • My recommendation is to do this treatment every day until you see noticeable result in fading of dark spots
  • Do not use lemon juice available in markets because they include preservatives and chemicals

No: 2 Beauty Tips for Face – Lemon Juice and Egg White

  • Simple and best remedy to obtain smooth, clear & beautiful skin
  • Make a solution of egg’s white and fresh lemon juice
  • Apply this solution to your skin
  • Wait for 10 minutes and rinse it off with lukewarm water
  • You may apply this remedy at least twice a week and get beautiful glowing skin

No: 3 Beauty Tips for Face and Skin – Tomatoes


  • Tomatoes consist of four major Carotenoids like Alpha-Carotene, Beta-Carotene, Lycopene, and Lutein. Rich in Vitamin C, Vitamin A and Potassium. Acids in Tomatoes will remove the dead layer of skin and the presence of Vitamin C helps to heal damaged skin. This wonder veggie is a natural skin toner. You should keep them in your daily diet to avoid risks of many illnesses and improve your skin tone for a younger look. May be applied topically to get rid of pimples, sunburns, brown spots and wrinkles to get beautiful freckle free, smooth, soft face.

No: 4 Tip Tomato Puree for Glowing Face

  • Make a puree of some fresh tomatoes with blender or a grinder
  • Now apply this paste to your face
  • Let the paste on your face for at least 10 minutes
  • Wash face with water
  • To have enlarged pores shrunk and to get smooth glowing skin, you should try this daily

No: 5 Sliced Tomato to Get Rid of Wrinkles


  • Slice some tomatoes and rub directly onto your face, targeting affected areas
  • Wait for at least 10 minutes and rinse if of with water
  • This will help relieve sunburn and wrinkles on your face and skin

No: 6 Tomato and Almond Paste for Smooth Texture


  • Make a rough paste of a tomato and few almonds
  • Mix and blend both the ingredients
  • Apply and rub thoroughly onto your face
  • Wash with cold water afterward.
  • This method is best for cleansing and provides smooth texture to your skin


No: 7 Aloe Vera, Honey, and Lemon juice Face Mask


I have discussed Aloe Vera in almost every article related to skin and hair problems. Honey and cinnamon mask can also be effectively used to get rid of pimples overnight. Without going into detailed properties and benefits of these three natural healers, let’s get straight to the point
  • Make a mixture of fresh extracted Aloe Vera gel one tablespoon
  • Raw Honey one teaspoon
  • Squeezed fresh Lemon juice two teaspoon
  • Apply to face, neck or other affected areas of your skin
  • Let it dry for 15-20 minutes and then rinse it off
  • You may use this face mask 2-3 times a week to get rid of acne and wrinkles
  • Alternatively, you can use Aloe Vera gel directly for Gorgeous looking face

No: 8 Baking Soda Beauty Fixes to Exfoliate Skin


We always keep Baking Soda in our kitchens for baking and other food preparations. Only a few of us know the beauty benefits of it. Baking soda has antiseptic and anti-inflammatory properties to reduce acne. Baking soda balances the pH level of skin to removes excess oil and exfoliate. Make a paste of Baking Soda as directed below.
  • Add 1-2 tablespoon of Baking Soda in Water for making a thin paste
  • Spread the paste all over your face and neck
  • Let it on your face for about 10 – 15 minutes
  • Wash with lukewarm water afterward
  • For noticeable results use 2-3 times weekly

No: 9 Papaya Facial Mask to Lighten Face Skin


You may refer to Health and Beauty Benefits of Papaya to get detailed knowledge about miracles of this fruit. It is definitely a gift of nature.

  • To make the Papaya facial mask you have to:
  • Mash few pieces of ripe Papaya to make a mask
  • Let the mask stay on for about 15-20 minutes
  • Wash your face with lukewarm water to reduce blemishes and lightens face skin


No: 10 Yogurt For Brighter Facial Complexion


It’s been proved that milk made products not only reduce irritation and redness but also moisturize our skin. Yogurt contains “lactic acid” that has bleaching properties and brightens the complexion.
  • Make a mixture of Yogurt and Honey by mixing 1 tablespoon of Honey and 1 tablespoon of yogurt till they become uniform in consistency
  • Dip your fingers or cotton swab in mixture and apply onto your face
  • Let one layer dry and then start a new layer
  • Wash of your face after 10-15 minutes
  • Try this daily for skin tone and brighter complexion


Bonus beauty tips for face and skin


  • Drink as much water as you can, to hydrate your skin and to boost metabolism
  • Add vitamin C to your daily diet like oranges, cantaloupe, leafy vegetables red papers, green papers, and broccoli
  • Quit bad habits such as smoking, not having enough sleep, drinking alcohol and coffee
  • Drink 2-3 cups of Green tea daily, for overall health issues besides skin treatment


7 Easy Ways to Make Your Hair Grow Faster


                  Professional Bridal Makeup Artist in Lucknow.


Realistically, there is no single magical way to grow your hair out super long, in record time (unless you count hair extensions, of course). So instead of simply lusting over celebrities' amazing mermaid lengths, we looked to experts for their suggestions on how to help your hair along, the old-fashioned way.

1. Dry Scalp Massage


Give yourself at-home scalp massages, says L.A. haircare specialist and stylist Philip B. Massaging your head can help stimulate the blood flow to your scalp, which helps nutrients get to your hair follicles more quickly. Better yet, nudge a *friend* to give you a scalp massage.

2. Wet Hair Massage


While washing your hair, massage the scalp with your fingertips, starting at the back of the neck and moving around the hairline. A perfect excuse to stay in the shower longer, no?

3. Vitamin 101


UCLA dermatologist Harold Lancer also suggests taking an over-the-counter vitamin every day that contains antioxidant blends and vitamin B derivatives to help fortify strands. Supplements like biotin, found at basically any local pharmacy, encourage healthy hair and nail growth, while some hair care experts recommend taking Viviscal as well to speed things up.

4. Get Trimmed


We know, we know: You're trying to *avoid* chopping off any length. However, healthy hair grows faster and if you keep on letting split ends work their course, they can keep forking further up the strand, damaging hair and causing breakage.


5. Condition, Condition, Condition


Fact: Shampoo takes all of the dirt and grime out of your hair and scalp, while conditioner replenishes nutrients that your hair needs to be healthy and shiny. To help keep your hair in tip-top shape without stripping your hair of its natural oils and nutrients, opt for a deep treatment hair mask more often and ditch the shampoo now and then in favor of a dry shampoo.

6. Lay off the Heat Tools


Deep down, you know that the burnt hair smell your straightener produces can't be a great sign for your tresses. To avoid heat damage, use your dryer, curling iron, and flat iron less, and when you 

7. Cold Water Rinse


Before you step out of the shower, douse your mane in cold water for a few seconds. This will help seal your hair cuticles and prevent moisture loss and heat damage. Alternatively, avoid using scalding hot water when washing your hair, as it can weaken and dry out strands over time.


Tuesday, 29 August 2017

Top 12 Bridal Makeup Tips


To me, a blushing bride is the most beautiful bride. But still, I can’t rule out the importance of bridal makeup. Every bride spends months planning her D-Day look. But a few things must be kept in mind to avoid going overboard. So here are few basic yet essential tips for bridal makeup by the renowned beauty expert Shahnaz Husain.

 Bridal Makeup Tips


Face:

1. Cleansing, toning, and moisturizing


A bridal makeup regimen, or any other makeup regimen for that matter, must start with skin cleansing. A radiant skin can make the bridal makeup look even more beautiful. After cleansing, apply a little toner followed by liquid moisturizer, for hydration.

2. Foundation and Compact


Shahnaz Husain advice to use a water-based, oil-free and light foundation for the sheer matte finish. Take a good amount and apply evenly all over the face. You may either use a damp sponge or your finger tips for application.

Once done, use a compact powder to set the foundation base. Shahnaz further advice to avoid using loose powder. Compact powder helps set a uniform skin tone and controls oil secretion too. Use a cotton wool to brush off the excess powder from the face.

3. Blush


Now comes the blush for the blushing bride. Shahnaz Husain bridal makeup suggests using pastel shades for highlighting cheek bones. The light color helps achieve a soothing appearance, giving a healthy glow to your complexion. Use a powder blusher and apply it with a brush on the cheeks and slightly below it.


Eye

4. Eye Shadow


Eye makeup is essential. Heavy and dramatic eye makeup is the latest craze among the brides. Cover the eye lids with a light eye shadow. Bronze, silver and GOLD eye shadows are commonly used for brides. Avoid going too bright with your eye shadow.

5. Eye Liner


Apply a thick line of eye liner on the upper lid close enough to the lashes. Smudge it slightly and apply again. At the corners, extend the black liner slightly upwards and then outwards. Now apply the liner on the lower eyelid just below the lower lash, starting from the middle towards the end. It is best advised to use a long-lasting, waterproof eye liner for bridal makeup.


6. Mascara


Mascara gives extra volume to your lashes. For gorgeous eyelashes, curl the lashes upward and apply two coats of good volumizing mascara. Always start from the roots, going ahead to the tip. Shahnaz Husain strictly advises using waterproof mascara to avoid smudging.

Lips

7. Lipstick


To make your lips and smile look luscious, wear daring shades of red on lips. Go for natural red or plum, cherry or rose-color, to match your attire. First, use a lip pencil to outline and define the lips. Now fill it with your chosen lipstick shade. Ensure that your lipstick and lip liner are of the same shade. Shahnaz bridal makeup highly recommends water-resistant lip color.

8. Lip Gloss


Complete your bridal makeup with a touch of good lip gloss. Shahnaz says this adds shimmer to your lips, making them more attractive.

9. Shimmer


Once done, apply slight shimmer on the inner corner of the both the eyes and cheekbones. This is essential for a healthy, glowing skin without being too shiny or oily.

10. Hairstyle


Hairstyle plays an equally important role. It further accentuates the look of a bride. Shahnaz Husain advises using hair shimmers and good quality hair products to match the hairdo with your makeup.

11. Go in for trails


Shahnaz Husain also advises going in for a trial makeup and hairstyle session before the wedding day. This is just to avoid any last minute surprises in form of blunders. You must know what you are going to look like. This gives you enough time to change anything that you’re unhappy with.

12. Don’t be stressed


Avoid getting stressed. This is your day. Enjoy it to the fullest. Smile lots and lots. Be happy, feel happy. Know you are beautiful within and that’s all that matters.

So these were few Shahnaz Husain’s bridal makeup tips. Share your tips and bridal makes up stories by leaving your comments below. And if you’re getting married, keep wearing that smile on!


10 Easy Steps For Asian Bridal Makeup


Being a bride is a special feeling. You would definitely want to look your best for the biggest day of your life! But there are many things you need to keep in mind during a wedding that things can sure get stressful. But one thing you need not worry about is makeup! With this glamorous and dramatic makeup look, you can surely wow the crowd. This makeup tutorial is easy to follow and you can also tweak the colors according to your preference.


10 Steps To Get Asian Bridal Makeup Look


Hop on! Let’s start our makeup journey!

Step 1:


Conceal all your dark circles with a heavy duty concealer. Lifting your eye makeup, this step will provide a stronger definition to your eyes. We obviously do not want to look tired and dull on our big day, do we? Here, I have used the Kryolan Derma Camouflage Concealer to hide and lighten my dark circles.


Next, let’s move towards the eye makeup. Pick up a creamy black kohl and thickly line your upper lash line. This step need not be neat as we would be smudging it later.

Step 2:


Apply a shimmery purple shade above the Kohl and softly blend it with a blending eyeshadow brush. Then, apply a bright and vivid red pink eye shadow slightly above your natural crease line. Then softly blend it with the purple shade. Here, I used Lakme Eyeshadow palette in Tanjore Rush for the Purple eye shadow and Claire eyeshadow in 0504 for the red eyeshadow.

Step 3:


Now apply a shimmery GOLD eyeshadow over the center part of your moving lid, keeping it below the crease area. This step will lift your eyes and give that gorgeous look. Here, I used Lakme Eyeshadow palette in Tanjore Rush to create the shimmery golden eyeshadow. Now apply a matte black eyeshadow to the outer V of the eye and pull it slightly inside till the center of your eye area. Here, I used Kryolan matte black eyeshadow.

Step 4:


Now, start blending all the eyeshadows to create a softer smokey look. Use a soft tapered blending eyeshadow brush for this step. I used the Kryolan crease brush here.

Step 5:


Apply the same purple shimmery eyeshadow over the crease to create depth for your eye makeup. Here, I used Lakme Eyeshadow palette in Tanjore Rush for the shimmery purple eyeshadow. Then, use liquid black eyeliner and draw a thin dramatic winged line. Here, I used Kryolan Black liquid liner.

Step 6:


Apply the same purple and gold eyeshadow to the lower lash line to create a balance in the eye makeup. Then apply black kohl to the waterline of your eyes.

Step 7:


Apply loads of voluminous mascara to the lower and upper eye lashes to finish the eye makeup. Here, I used Loreal Million Lashes mascara.

Step 8:


Apply a full coverage liquid foundation to your face using a flat foundation brush or a sponge. Here, I used Mac Studio Fix Liquid Foundation. Then, set the face makeup with a compact powder to prevent budging. For this step, I used Lakme Face Stylist Compact.

Step 9:


Apply a light pink matte blush to the cheek area softly. Here, I used Lakme Chromatic Blushes in Day Blush.

Step 10:


Apply a light nude pink lipstick to your lips. This step can be replaced with a red or maroon colored lipstick too, but as the eye makeup is heavy, I preferred a softer lip look. Inglot lipstick refill in 81 was topped with Maybelline Color Sensational Lip Gloss in Touch of Toffee to create the lip makeup.


And a beautiful bridal look is ready for you to rock!

That was easier than you expected, right? Looking beautiful on your big day should not stress you out. Rather it should come naturally. With this makeup look, you can be the center of attraction on your D-day, as you should be!


Professional Bridal Makeup Artist 

Bridal Makeup Services.


Source

Friday, 25 August 2017

Best Indian Bridal Makeup Tips, Ideas & Tutorial to Try:


For all Indian girls, if your wedding day is coming soon ahead then here is a thing of your interest. Every girl wants to give her best look on her biggest day of life. Where there are many exciting things about marriage, there also are many stressful ones but for what you don’t have to worry is your makeup. Through the step by step tutorial I am going to teach you today, you can get a glamorous and dramatic look that will win the hearts of the crowd. today we will discuss the latest Indian bridal makeup tutorial.


This Indian bridal makeup tutorial is very easy to follow.


Step 1:


The first step of every makeup is concealer and foundation definitely. Hide your dark circles by using concealer, this will provide stronger definition to your eyes and also demolish the tired and dull look. Use a good company or branded product for not only concealer but for all the makeup you are going to use for your wedding day. Quality matters a lot for better results. After concealing, apply a thick line of dark black kohl on your upper lash line. Neatness is not the utmost requirement of this step as later on we will be smudging it.


Step 2:


Now apply a shimmery purple color or the most prominent color of your dress above the Kohl and blend it softly with eye shadow brush. Then apply a bright eye shadow of pink color or again according to the outfit color above the natural crease line of your eye. Softly blend this eyeshadow along with the previous one and give an even look to your eye shadows. A variety of branded eye shadow kits is available in the market that may help you sort out the right color.


Step 3:


Fill the center part of your moving lid with shimmery golden color. It helps to lift your eye and gives gorgeous look. Create the shimmery golden look of your eye and then apply a matte black eyeshadow to the outer V of the eye.


Step 4:


To create a soft smoky look, blend the eyeshadows well and for this purpose use a soft tapered blending eyeshadow brush.


Step 5:


Now apply the same purple shimmery shadow over the crease, this will create depth. After that use liquid black liner, I suggest & draw a thin winged line that will create a dramatic look.


Step 6:


Embellish the lower line with the same purple and gold eyeshadow, this will create a balance in the eye. Now darken the waterline with black kohl.


Step 7:


Let’s come to eyelashes, as a bridal you need to put false eyelashes and volumetric mascara. Your eyes are now complete.


Step 8:


It’s time for your remaining face. Apply a flat foundation over your face and neck. Then afterward set the foundation with face powder to prevent budging. Remember that you always have to give time to your foundation to settle down.


Step 9:


Apply a light pink or peach matte blush to cheek area for the dominance and soft touch of your cheekbone.


Step 10:


Apply a red, maroon, nude pink colored lipstick on your lips. As the eye makeover is heavy, so you better make a choice of soft color.
And a complete Indian bridal is ready. It was easy then you expected. Keep on checking us and stay updated on the things you like to know.


Thursday, 24 August 2017

10 Easy And Quick Friday Hairstyles You Can Try


With parties, black tie events and family get-togethers comes the difficult part: hairstyles. And if you are hunting for that one easy hairdo to match your makeup and dress, you have come to the right place. Skip the boring hairstyles this season, and give our ten Friday hairstyles a go for an impressive party-perfect hair. Not only are these hairdos super versatile, but they’re equally easy to recreate at home.

Let’s have a look at 10 quick and easy Friday hairstyles here!

1. Bubble Ponytail:


Actress Olivia Holt shows another way to wear a simple ponytail by placing a lot of hair ties in between her ponytail for a bubble effect. Meanwhile, the rest of her front hair was pulled out and backcombed for a bouffant. The fuss-free hairstyle is ideal for a perfect concert, summer events or even a night out with your girls when elegance is everything.


2. Topknot With Bangs:


At the premiere of Home, Rihanna looks fabulous with her straight, brown hair in a playful topknot. For a roughed-up, yet effortlessly chic look like the Four Five Seconds singer, ensure to add a lot of hairspray before pulling it up for an updo, and don’t sweat the disheveled strands as they all add to the rock chic style.

3. Side-Swept Waves:


We love actress Aishwarya Rai and her bombshell look at The 68th Annual Cannes Film Festival. Completed with a tumble of subtle waves and lots of volumes, the actress’ oh-so-glamorous hairdo requires only a thick barrel curling tongs and hairspray.

4. Half Up, Half Down


Paris Hilton’s half up half down hairstyle is fast to make and equally perfect for a day out or even for a beach wedding. Recreate Hilton’s simple half up’do by teasing hair at the crown and then securing it with a discreet hair pin at the back of your head. For that extra volume and fine hair, apply a good amount of volumizing products.

5. Messy Side Pony


Here, actress Katherine McNamara demonstrates the perfect example of a messy side ponytail that can be worn virtually anywhere. We love the messy look of her hair, which isn’t too overdone and the wispy tendrils that frame her face beautifully. Unfussy, unkempt, but totally sexy.


6. Choppy Bob


The Modern Family actress, Sarah Hyland, typically does no wrong in the beauty or hair department, but we especially love this stunning, two-toned and choppy bob. From short to medium, any length of hair would work for this type of chic, simple and elegant style – the only styling tool you might want to use is a curling wand, to make sure the hair stays choppy. Also, add texturizing spray for some extra shine.


7. Long Straight Hair


We love how fabulous Chantel Jeffries looks with her shiny, sleek straight hair. To recreate Chantel’s elegant and polished look, blow dry the center partitioned hair, followed by applying a little texturizing gel on top and sides of the hair for shine. Then use a flat-iron to get your long hair straight and smooth it out with some anti-frizz serum.

8. Loose Side Plaits


Georgina Campbell looks stunning with her long, luscious tresses done in a casual braided up’do. The Murdered by My Boyfriend actress sports an undone and glossy hair that has been loosely set with the help of hairspray and braided to one side. And those delicate flyaway hairs that frame her face? We love it!


9. Sexy Updo With Headbands


Glee actress and fashionista Dianna Agron looks gorgeous with her sexy, undone updo. To get Dianna’s chic look, use a flat iron and a non-greasy hairspray to keep your locks in place. Once done, tease your hair to create a bouffant and grab your hair up for a messy updo. Finish off the look by adding elastic headbands for a more youthful look. As beautiful as Dianna’s makeup, the undone texture adds to the romantic effect.


10. Formal Bun


Yes, you read it right; you can wear formal bun to a party! Take inspiration from Selena Gomez and pull your hair up and tie up in a neat ponytail. Secure the ponytail with a discreet hair pin, and wrap it for a formal bun. Voila – a perfect sleek bun!


Best Hair Stylist in Lucknow.

Best Hair Salon in Lucknow.


Source


How To Do Nail Art At Home?


            Professional Bridal Makeup Artist in Lucknow. 


Nail art. It can be a total bummer sometimes.


We often see complicated tutorials of intricate designs and are often put off by it. Something a little simpler would definitely draw more people in. Maintaining your nails is honestly the best accessory since you just need to do them only about, once a week.

How To Do Nail Art At Home


These tutorials are quite simple and can be done with the things you’d find right at home. So, read on to get pretty nails!

1. Tri Color Cliffs Nail Art


This nail art is super simple and is the perfect choice for someone who is just starting out. You don’t need any extra tools apart from your nail polishes for this one. This tutorial will be described using certain colors, but it’s entirely up to you! Play around with your choice of colors!

What You Will Need


  • Pastel blue nail polish
  • White nail polish
  • Pastel coral nail polish


How To Apply?


  • On clean nails, apply a base coat to protect your nails.
  • Use the pastel blue color to create a vertical stripe on one corner, while leaving some space empty near the cuticle.
  • Now paint from the center, a little lower.
  • Create the last stripe, again lower. You should have what looks 3 steps.
  • Repeat the steps but starting from below the blue.
  • Do the same with the pastel coral.
  • Seal this with a top coat and you are done!


2. Bow Nail Art Tutorial


Now that you’ve gotten the hang of doing nail art with just the nail polish, it’s time to start adding tools to the pretty picture! This is also an incredibly simple nail art that you can easily do! It’s very casual so it can be worn at all times.

What You Will Need


  • Sky blue nail polish
  • White nail polish
  • Black nail polish
  • Nail stripper or a very fine paint brush


How To Apply?


  • Start by painting all of your nails with the sky blue shade as your base color.
  • Paint over it with white in a heart shape as shown in the image.
  • Using a nail stripper or a paintbrush dipped in black nail polish, follow the shape where the white and blue meet and create two loops at the center so that it looks like a bow.
  • Seal it with a top coat, and you are good to go!


3. Splatter Nail Art Tutorial


This one is for the artist to you. You can create a fun paint splatter pattern using just a paintbrush!

What You Will Need


  • White nail polish
  • Light blue nail polish
  • Purple nail polish
  • Pink nail polish
  • A stiff paint brush

How To Apply?


  • Paint all your nails with white as the base color.
  • Now comes the fun part. Find a stiff brush like the one shown in the image. Dip it in the light blue polish, and run your fingers through the brush and direct it at your nail so that the brush splatters on your nails.
  • Repeat the same thing for the pink and the purple.
  • You should have a nice splatter nail art.
  • Use a cotton swab dipped in nail polish remover to clean up the sides around the nails.
  • Seal it with a top coat.


4. Chevron Nail Art Tutorial


Okay, I know what you’re thinking. This may seem complicated, but the best part is, it’s actually easy. For the tutorial, red, white and blue were used but the choice of colors is all up to you!

What You Will Need


  • Red nail polish
  • White nail polish
  • Blue nail polish
  • Tape

How To Apply?


  • Use red nail polish as the base for the chevron nail art.
  • Strategically place the tape so that it creates a chevron stencil.
  • Paint over it with the blue polish.
  • Wait for a minute or so to remove the tape.
  • Now place the tape as shown near the cuticle and paint the area with white.
  • Again, wait for a minute before pulling off the tape, and seal it all with a top coat.


5. Glitter V-Tip Nail Art Tutorial


Is there a party around the corner? You probably had plans of going to the salon to get your nails done, but something else popped up, and now, you’re short on time with your nails undone. This nail art is perfect as they’re easy enough to do when you’re in a rush.

What You Will Need


  • Black nail polish
  • Silver glitter nail polish
  • A ‘V’ shaped sticker or a piece of tape.

How To Apply?


  • Paint all your nails black as the background color.
  • Place the V sticker or the corner of a piece of tape near the tips as shown.
  • Paint the bottom half with the glitter polish.
  • Wait for a minute before you carefully pull away from the tape or sticker.
  • Finish it off with a top coat.


6. Galaxy Nails


These nails are out of this world! I love anything to do with space. In fact, one of my favorite genres of books and films is sci-fi so it’s no wonder that this nail art made it o this list.

What You Will Need


  • Black nail polish
  • Metallic green nail polish
  • Pink nail polish
  • Blue nail polish
  • Makeup sponge
  • Glitter top coat

How To Apply?


  • Start with a black base.
  • Apply some metallic green on a makeup sponge and dab it onto your nail.
  • Now apply the pink on a makeup sponge and dab onto the nail.
  • Continue the same process a blue shade.
  • By this point, your nails will already start to resemble the galaxy.
  • To amp up the game, add a glitter top coat, and you’re good to go!


7. Stripes and Lines Nail Art Tutorial


These fun geometric patterns add a little something to your nails and are super easy to do. You need a little patience for this one, but the outcome is worth it!


What You Will Need


  • Pastel blue nail polish
  • Brown nail polish
  • Tape

How To Apply?


  • Start with the pastel blue as your base.
  • Once it is fully dry, you can begin the placement of your tape.
  • On the pinky, place it diagonally.
  • Cut up thin stripes for the ring finger.
  • Create a ‘V’ shape from the tape for the middle finger.
  • Create very sharp angled triangles with the tape and place them on the index finger as shown.
  • Similarly, create a design for the thumb finger.
  • Now, paint over the tape stencils you just created with brown nail polish.
  • Wait for a minute or so for the nail polish to dry a little and then carefully remove the tape.
  • Voila! You have yourself a fun manicure!


8. Pastel Daisies Nail Art Tutorial


Ready to step up your nail art game? This honestly looks so pretty, I’m tempted to try this one out on my nails! I’m weak for anything pastel so this one is straight up my alley as far as nail arts are concerned.

What You Will Need


  • Base Coat
  • Pastel pink nail polish
  • White nail polish
  • Gold studs, bindis, or gold polish.
  • Gold glitter nail polish
  • Dotting tool or a bobby pin

How To Apply?


  • Apply a base coat.
  • Apply the pastel pink polish to all your nails except the ring finger.
  • Place a gold stud near the cuticle of the index and pinky fingernails. Do this while your polish is still wet. This helps it to stick on. In case you do not have any studs or bindis, you can use gold polish.
  • Now moving onto the middle and thumb. These two nails will be clad in daisies. Use a dotting tool to create 5 dots in a circle so that it looks like a daisy. If you don’t have a dotting tool, you can use the end of a dotting tool.
  • Place the gold stud or gold nail polish at the center of the daisies.
  • Now all that’s left is the ring finger. Apply the gold nail polish as the base, and the glitter polish over that. This gives it a more intense look.
  • Seal everything with a top coat, and there you go!


9. Nautical Nails


A fan of sailing and the vast open waters? Then this nautical nail is probably perfect for you. And if for some reason you don’t like the ocean, that’s okay because this still makes for a really cute nail design.

What You Will Need


  • White nail polish
  • Navy blue nail polish
  • Red nail polish
  • Nail stripper or a fine paint brush.
  • Toothpick

How To Apply?


  • Start with a white base.
  • Use a nail striper dipped in navy blue nail polish to create stripes.
  • Now, using the blunt side of a toothpick, create an anchor design. First, create a tiny circle.
  • Then, create a line down from the circle.
  • Draw two lines from the vertical line so it looks like an anchor.
  • Finally, draw a horizontal line in the middle to complete it.
  • Seal it with a top coat and you are ready to sail away!


10. Monochrome Polka Dots Nail Art Tutorial


Let’s finish off this list with an easy one, shall we? I love this one! Anything monochrome is my cup of tea. This black and white polka dots nail art is another cute one which can be achieved with minimal effort.

What You Will Need


  • Black nail polish
  • White nail polish
  • Dotting tool, bobby pin or pencil.

How To Apply?


  • Paint all of your nails black.
  • Using a dotting tool, the back of a bobby pin or a pencil dipped into white nail polish, create dots.
  • It’s as easy as that! Finish with a top coat.


Let’s check out some tips that would make your nail art process a little easier.

Important Tips And Hacks To Do Nail Art At Home

  • Most of the times, people have an issue with keeping their hands steady. Make sure to work on a flat surface and sit down while doing it. This will give you more control.
  • Line the skin around your nails with petroleum jelly to ensure a quick clean up.
  • You can also apply a layer of glue around the nails so that it can be peeled off after you finish your nail art.
  • Use a paintbrush dipped in nail polish remover to clean the area around your nails.
  • Make sure your nails are free from any oils or lotions before you start with the nail art!

Tempted to try them out? Well, I definitely know I am. My nails have been bare for a while maybe it’s time to dive back into nail art again. Nail art can be quite therapeutic. It gives you some time to be alone and gather your thoughts, and by the end of it, you have beautiful nails! Who can say no to that?


Wednesday, 23 August 2017

How To Choose The Right Hair Color For Olive Skin And Brown Eyes?


        Vikas Srivastava Professional Bridal Makeup Artist


Before making a note on which hair color shade to choose for damsels who have been blessed with sultry olive tones for their skin and enchanting brown eyes, there is something we must do. It is to learn a little bit more about the importance of determining the right hair color for the skin tone you have been blessed with!

Read on to know more!

You Need A Change:


Growing up, mothers applied the lovely coconut oil to nourish our tresses and keep them shining- a sign of good health. But in this day and age, we want a change, a break from the cacophony of what was to what can be, and hence going a little quirky, bold and bright with hair colors, dark or light can be a fun thing to do.


Play along with your positive points, your attributes, and your personality, and then ask yourself, if the color you see on glossy magazine models and celebrities, would best suit your stance or not!Remember PYTs, what may look hot on someone else, may be a recipe for disaster when it comes to you. This is why it is so important to have the right dye shades and colors, those that would compliment your skin tone and not contrast it!

What Is Your Skin Tone?


We are blessed with warm or cool skin tones, and there is a way to find out which one is us. Here are the steps-Wash your face with a mild herbal cleanser to get all the dirt, grime and impurities removed
Stand in front of a mirror, in a room that has plenty of natural light coming through

  • In one hand, hold a red piece and a yellow piece of paper
  • In the other hand, blue, silver, green and white pieces each
  • Place each paper on the surface of your facial skin- ONE AT A TIME
  • If a certain color flatters your skin and makes you glow more, for example, if yellow or red does the flattering, you then have a warm skin tone. If it is any of the colors from the other group, then you belong to the cool skin tone group!


You could do the same trick under the sun, using the pieces of colored paper individually. Bluish-tint means cooler tones, while greenish tints mean warmer skin tones.

What Is The Correlation With Hair Color Choices?


Now that you know how to check for the undertone of your skin, and this isn’t a permanent feature though for life, thanks to the sun tan and the elements that can brighten or darken the skin- olive skin and brown eyed men and women have green undertones to deal with.

  • Shades of red are the best
  • Strawberry blonde hair color is nice
  • Auburn brunette is classy


Should You Have Red Skin Undertones?

Think about the following colors-


  • Mocha browns
  • Icy blondes
  • Violet reds


Tip: If you are dark olive skinned, never use medium browns and blondes.


Talking about the eyes, while most with blue eyes use copper hair color, and hazel damsels wear browns and chocolates, with olive eyes to flaunt, you could think of

  • Orangish reds
  • Golden blondes
  • Honey blondes
  • Chocolate brunettes
  • Should You Have Warmer Skin Tones?
  • Ash browns are the best match
  • You could think of beige
  • A touch of champagne blonde
  • Deep reds too would be sassy
  • Violet and auburn mix


What About Ombre And Should I Think Of It With Brown Eyes And Olive Skin?


Yes, why not! Go right ahead and think ‘sombre’, and not ‘ombre’, the latter is so out of fashion in 2015. Warm and cool toned skin and eyes can use somber colors, for a very natural touch and effortless effect!

We would ask you to check with your personal hairstylist to know which color would suit you the best, and check with the shade card too. Have fun coloring your hair, but let it compliment your overall feature and not just the eyes and skin!


Best Beauty Salon in Lucknow

Best Makeup Academy in Lucknow.


Source

Arabic Bridal Eye Makeup Tutorial – With Detailed Steps


            Professional Bridal Makeup Artist in Lucknow


If you want to try something new for your bridal makeup, then this one is for you. Read on to know and learn the step by step illustration of Arabic bridal eye makeup.


Arabic bridal makeup focuses on two key elements – gorgeous, bold and dramatic eye makeup and subtle cheeks and lips. You can easily create this look by following the simple steps mentioned below.

The step by step Arabic wedding makeup tutorial is explained below:

Arabic Bridal Eye Makeup:


Step 1:


Let’s begin the eye makeup by covering up all the patchiness around the eye area. I have used my Mac foundation and applied it as a concealer. If you have dark circles, then you should use a corrector before applying the concealer.

Step 2:


Now, apply a medium brown matte eye shadow on the crease. Do it using a wind shield brush in a wiper motion. This step will give an illusion of deep set eyes. Please be very careful while application. Ensure that you don’t go beyond the crease area and not move inside the lid area.


Step 3:


Now, apply a dark black eye pencil to the outer corner of the eye over the brow in the shape of ‘C’. Extend it to create a winged shape.

Step 4:


Use a flat eye shadow brush for this step as it helps to achieve maximum color intensity. Remember to create maximum color intensity here. I have used the Lakme eyeshadow Tanjore rush quad for the gold eye shadow. Here, carefully pat the eye shadow over the central part of your eye lid instead of sweeping it as is usually done. The patting motion will help to apply the color uniformly.

Step 5:


Now, use a flat brush and pat a bronze shade over the outer third corner of the eye. Don’t go very far outside but just at the place where your eye socket ends. This step will give a transition of colors from gold, bronze to black.

The finished look is important. It should not look like there are three different shades used but a perfect blend of shades merging seamlessly into each other. At the same time, do not swipe too much, so that the metallic finish of these shadows is not lost and mixed. There should be a soft gradation of colors.

Step 6:


Apply dark kohl a bit thicker than the usual line on the upper and the lower lash line. Here, I have used a gel liner to create maximum color intensity, you can even use a liquid liner.

Arabic eye liner has a bold dramatic winged liner look. Extend the eyeliner to create a wing at the outer corner of the eye. Make it pointing downwards on the inner corner of the eye for the classic Arabic winged liner look.

Remove all the fall-out of the eye shadows below the eye with the help of a cotton swab. Apply a light concealer to highlight your eyes.


Makeup Artist in Lucknow

Bridal Makeup in Lucknow.


Source