Friday, 22 September 2017

8 Winter Weather Makeup Tips for When Your Skin Is Super Dry


Now that the sun goes down before 5 p.m., it’s a sign of the terror that’s around the corner. Winter is coming, and that means gusts of wind nearly knocking you over and drying your skin out to the max.

No matter how much you bundle up in fluffy scarves and puffy jackets, it’s hard to protect your face from the harsh winter conditions, making the task of covering up dry, rough skin and Rudolph-colored noses even tougher.


But don’t worry —
it is possible to do your makeup when your skin is super dry, and we have eight tips from makeup artist Suzy Gerstein and our own personal winter-ready arsenal to make it easy.


Prep your skin at night


Starting with moisturized skin is like keeping your car oiled — it’ll be easier to run foundation over it when you get ready. Powerful masks like GlamGlow’s ThirstyMud or celeb fave Wilma Schumann Hydra-Gel Red Wine Treatment Masques provide deep, intense hydration with nourishing ingredients. Use them once a week and see how much your face needs it.

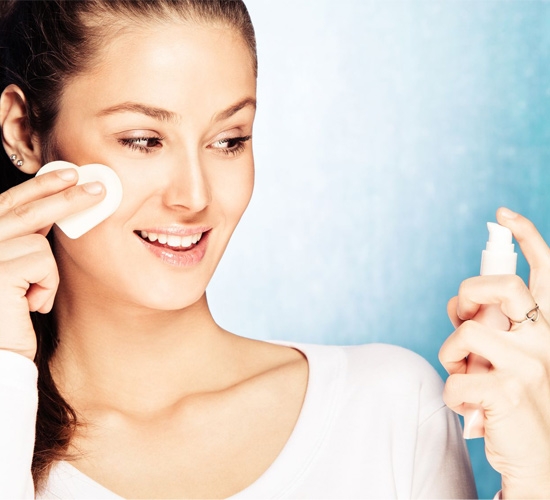
Wash your face with gentle ingredients


Another skin care prep comes from washing your face every day. Go for something gentle, like La Roche-Posay Micellar Solution — which removes makeup, tones, and cleanses without rinsing or letting the water dry out your skin — or First Aid Beauty’s Milk Oil Conditioning Cleanser, which removes makeup and dirt while smoothing skin with avocado and coconut oil.


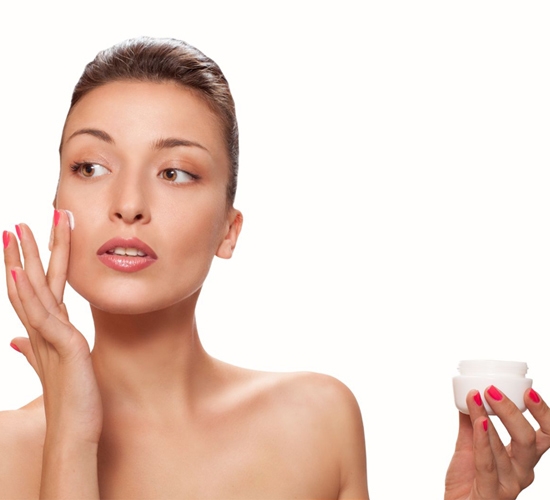
Moisturize, moisturize, moisturize


The last step before grabbing your makeup is obviously using a great moisturizer. Makeup artist Suzy Gerstein suggests looking for “products with moisturizing and anti-inflammatory ingredients to combat the flakiness and irritation that characterize winter skin.” If you have oily skin, try a gel product, like First Aid Beauty’s Skin Rescue Mattifying Gel that absorbs immediately and minimizes pores. If you have combination or super-dry skin, try Skyn Iceland’s Arctic Hydrating Balm that uses cryogenic technology from the Arctic to repair and moisturize skin. No matter what you use, just make sure it’s absorbed before you start putting makeup on.

It’s prime time


You don’t need a primer if you’ve followed all of the above steps, but it doesn’t hurt. You can combine lotion and primer with Lush’s Magical Moringa lotion that has argan and rosehip oils, or go for the glow with the whipped, pearl-filled lightweight Becca Backlight Priming Filter. The point is to get an even canvas for your makeup, something you can also achieve by adding drops of Cover FX’s Custom Cover Drops to your favorite moisturizer. Two birds, one stone.

Opt for lightweight coverage


When your skin changes, it’s a guess and check system to see what works for you. Suzy suggests working in thin layers and seeing what the skin needs, like a few drops of face oil (or even almond oil) in your foundation. You should “experiment with different products, and see how your skin absorbs them throughout the day,” whether it’s a CC cream like Jane Iredale’s Dream Tint Tinted Moisturizer that gives your skin a soft-focus effect while locking in moisture and calming redness, Tarte’s BB cream that has a built-in primer and up to 12 hours of staying power, or your own foundation that you sheer out a bit with a tinted moisturizer.

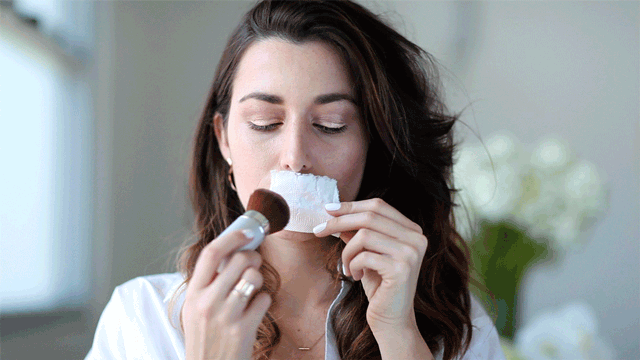
Whatever you use, Suzy’s easiest trick is to “blend all your edges with a damp Beauty Blender so it all looks seamless,” from light bronzer, to blush, to foundation.


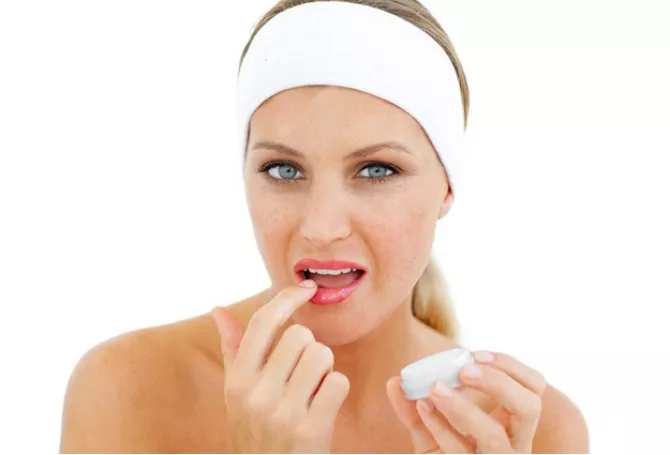
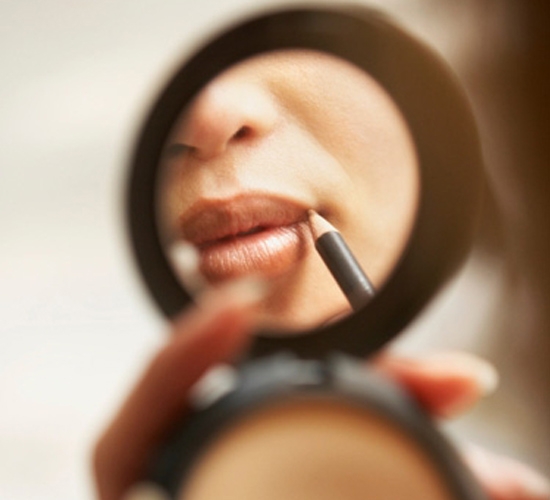
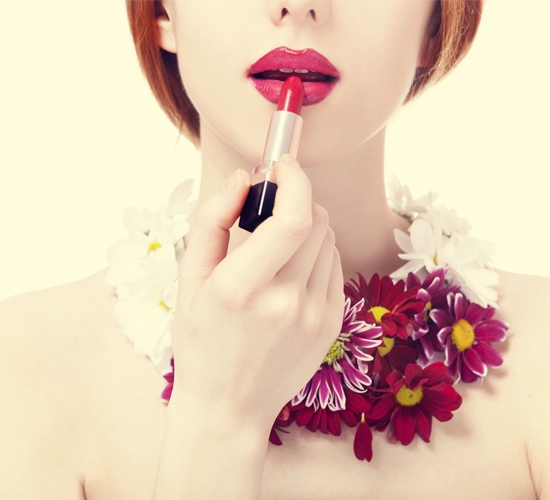
Keep your smile happy, too


OK, we don’t mean your teeth, but it’s important to exfoliate your lips to get rid of all of the dry, dead skin so you can wear gorgeous lipstick. The Santa Lip Scrub from Lush tastes like chicken-cherry cola (remember Savage Garden, guys?) and its slight red tint will go perfectly with a bombshell red lipstick. We love the Red Door Red from Elizabeth Arden’s Beautiful Color Moisturizing Lipstick line, which seals in moisture and makes your lips look fuller and plumper — even in the winter.

When your lips get dry and you’re out having fun, don’t touch up with lipstick! “If you've done a bold matte lip for a night out, rather than touch up with the lipstick you've used, which can start to feel dry and yucky as the night goes on, throw a tinted lip balm into your bag in a bright shade and touch up with that instead,” Suzy suggests.


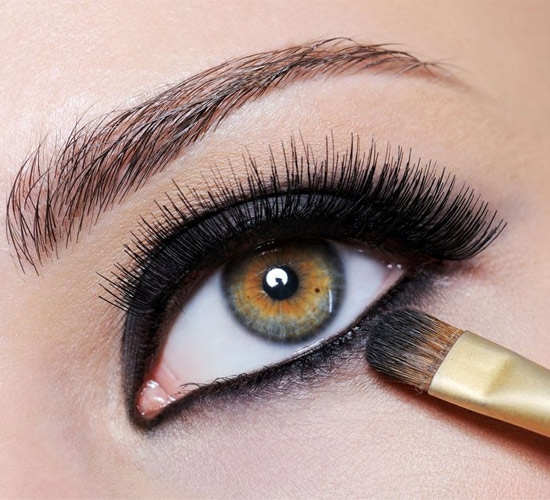
Don’t go overboard on other makeup


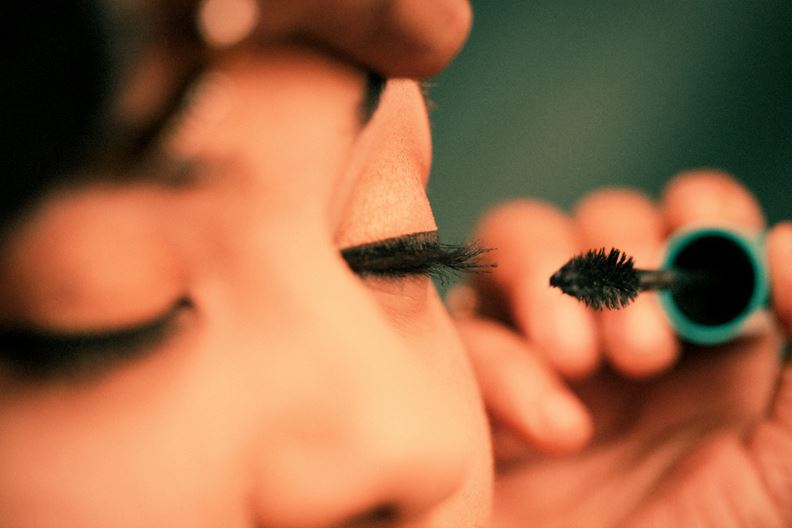
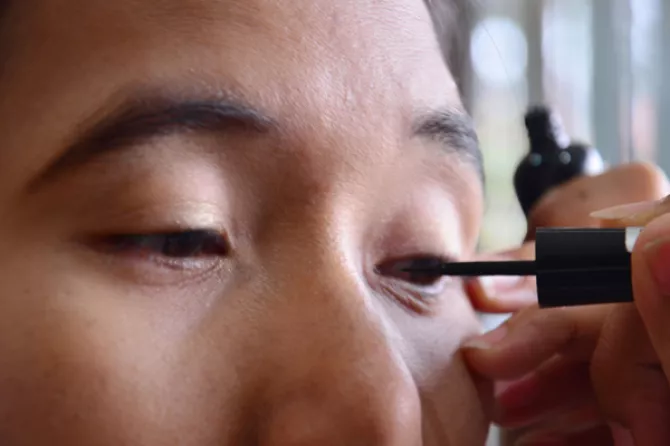
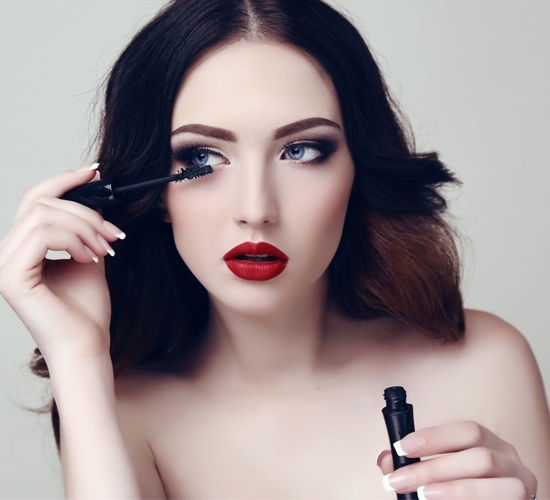
With your skin so sensitive and dry, it’s better to ease up on product use in the winter. A little blush or bronzer on your cheeks will do, but really, the rosy redness from the cold weather will go a long way naturally. Focus on your eyes, using a waterproof mascara like Benefit’s Roller Lash to make ‘em pop while not crying black tears from the wind hitting your face, strong brows, and a simple eyeshadow like just one shade from your Naked palette.

Set it, but don’t forget it


Using a setting spray is always the perfect finish, but take it one step further when you’re trying to hydrate with Jane Iredale’s Pommist Hydration Spray, packed with pomegranate and white tea leaf extracts, or Urban Decay’s cult-favorite Chill Cooling and Hydrating Makeup Setting Spray. Now your makeup won’t budge, and your skin will stay fresh all day… until you repeat the process all over again.

Suzy also suggests filling a rollerball with virgin, cold-press coconut or argan oil to roll over the cheeks and any dry patches for quick touch-ups. Sigh, is it spring again yet?


Bridal Makeup Tips and Tricks you Just Can’t Miss!


Your fairy-tale wedding day look has been your dream since teenage. But it takes an effort to get it all perfect… Discover our top 5 Fav Bridal Makeup Tips and Tricks every girl MUST know!


You already know that the perfectly glowing Indian bride doesn’t happen by chance! So here are the top bridal makeup tips and tricks to help you keep it glowing – just like you’ve always imagined…


Prep up Your Skin!


The Gorgeous Indian Bride!


The most important ingredient of your flawless glowing bride look is… healthy flawless skin! And there are no shortcuts here… so start months ahead with those healthy greens, fresh fruits, and chuck out those fried nasties from your diet.


Beauty Basics!


Why? Not only does makeup sit better on the smooth and hydrated skin, those occasions where you go sans makeup (think “haldi” ceremony) get taken care of too!

Zero Makeup Tip – Get your eyebrows done at your regular place (a week before the D day) – for those perfectly mystic bride eyes.

Get your Basics Right!


That Glow comes from LOVE… and Makeup!


Everything rests on a strong foundation… including your make-up! I know you already know, but since you might be investing in a new (water-proof) foundation – I can’t but repeat – it’s all about covering your blemishes and achieving the perfectly toned skin. NOT about achieving a lighter skin tone!


Flawless Glow!


So ladies, be comfortable in your skin and get the accurate shade and brand that you must try for at least 2-3 months before your wedding day (we don’t want any unhappy surprises!)

Makeup Tips – On your D Day – use a gel foundation for its staying power!

Bridal Makeup Tips – Go Waterproof!


Beauty Lies in Those Eyes!


No matter how much of a bridechilla you are, be prepared to shed some tears! And you can’t ignore the threat of sweat under those strong harsh lights. So of course, everything has to be waterproof and smudge-proof! Right from your foundation to the last coat of mascara.


Stunner!


If your current makeup stash isn’t waterproof – invest in some new stuff that is. And do this month before the wedding day so you have time to try them all out.

Eye Makeup Tips
– Don’t use glittery eye-liners, not very photogenic! And no matter how much you love your kajal pencil – on the D day it is nothing but liquid eyeliner.

The Must Do for Every Bride – Makeup Trial!


Most make-up artists and hair stylists provide trial sessions for bridal makeup. Go ahead, and get yours done – and be 100% sure which look brings out the best in you! Also, ask your make-up artists about the brands she’s using on your skin, and if they’re not your regular brands – a trial will help you avoid any breakouts or blemishes on your wedding day.

Makeup Trial Tips – Click your makeup trial pictures & note down the shades used!


Bridal Makeup Tips for The Perfect Pout!


Pretty Pout!


Your lips must be neither too bold nor too bland – they have to be just perfect! While the usual wedding colors are reds, pinks, and corals, you must match the shade with your outfit. And lip-liners are a must. Don’t be afraid to try nude shades if they suit your skin and face!

The Pop Pout Trick –Peel Off Lip Stains are the latest thing. Just apply-dry-peel-off and you’re good to go. They last super long too – but be sure to try it before so you know you like the look!


In Short…


Bridechilla!


These aside, rest well – late night fun can eat into your beauty sleep. And don’t panic – even if something goes wrong, you can always fix it (just keep your favorite top-up makeup stash & your BFF nearby)!

With these bridal makeup tips and tricks – you’re good to go! If any of you have a secret lifesaver makeup tip or trick – do share with us!


Wednesday, 20 September 2017

6 Different Types of Nose Rings –


The nose ring is one of the essential ornament for Indian brides during the wedding and picking up the right one can help you to give a flawless look. It is very important to pick up the appropriate type of nose ring according to your face shape as it has the power to add or decrease the glamour from your face. When it comes to a nose ring, there is no other woman except Rati who can explain us about, how to rock this trend. I tried to club different styles of nose rings which Rati has flaunted effortlessly.


1. Segment Rings:


Segment rings are generally for those who have high and broad cheekbones. Segment rings are the same which was carried by Sonakshi Sinha in the movie Dabangg. So, if you are the one with sharp and high cheekbones, we recommend you to use segment rings. These segment rings are one of the best rings that looks great on Rati’s face.


2. Dainty Studs:


People with a small nose should be extra cautious while selecting a nose ring. Dainty studs are the one for those who have a small nose. Dainty studs look absolutely good and subtle when worn over a small nose. A tiny diamond or a crystal ball is enough to make your resemblance a memorable one.


3. Embellished Chains:


The trend of embellished chains was rocked by Deepika Padukone in Bajirao Mastani. Embellished chains are for those who have an oval-shaped face. A running chain with a large ring on the nose is a great way to balance the oval shaped face. This is generally worn by most of the Punjabi brides. If you are carrying a sharara or Pakistani apparel, embellished chains are the best.


4. Half-Hoops:


For a woman who has a round face should opt for half-hoops style. This half circle ring will make your face look slimmer and stylish. A woman should wear the half circles as the arch shape of the nose ring can help to balance the chubby face of a girl. These days, there are several types and designs in half hoops, so you a pickup anyone among them. Rati you rocked this trend :*


5. Beaded Hoops:


Beaded hoops are one of the simplest yet stylish forms of nose rings which can be carried without any effort. This edgy beaded hoops can help to add volume to your thin and skinny face. These rings are heavy and can work well on a woman with a broad forehead and narrow chin.


6. Large sized Naths:


Loved Aishwarya Rai’s appearance in Jodha Akbar? Thanks to the largely sized naths which complimented Aish’s look equally. Largely sized naths should be preferred by a woman with a heart-shaped face as it helps to draw attention from the wide nose and a broad forehead. These are generally worn by brides from Rajputana family or other royal parties. Look at the way, Rati carried this royal attire along with a beautiful jewelry.


Tuesday, 19 September 2017

Top 7 Makeup Trends to Watch Out for This Fall 2017


While summer is a more laid-back time for beauty, with rising temps encouraging you to wear less makeup and spend more time relaxing, fall—at least according to recent runway shows—calls for a new motto: go bold, go warm and go big. While the high-fashion looks from the runway are quite more appropriate for your girls’ night out, makeup artists have given us a glimpse of what they predict most of us will be toting around in our everyday makeup bag. Here are the “wearable” fall makeup trends you’ll want to follow, according to the pros:


1. Color-blocked lids


Though you’ve probably been rocking color-blocked dresses and blouses for years now, contrasting hues are making an appearance in makeup looks. Freelance makeup artist and beauty expert Hillary Kline suggests bringing this trend to your eyelids by using a bright, bold eyeshadow color that speaks to you and brings out your eye color. Then, choose a contrasting color to apply as a liner, using a thin brush to make it subtle. For fall, she suggests fuchsia, electric green or a vibrant blue—or consider fall’s hottest hues like burnt orange, copper, and other metallic colors—and then finish off the look with a few coats of mascara. “Let the eyes be the statement and go light on the rest of your face makeup,” she adds.


2. Graphic Liner


In addition, to color-blocking your eyeshadow, makeup artist and global ambassador for Cover FX Derek Selby says eyeliner will become even braver and bolder. Instead of the classic winged look, Selby says to tap into your inner grunge and try a super-thick line. For those who dare to go darker, he suggests drawing a graphic line that floats from the crease of the eye to the outer edge of the brow.


3. Highlighting the inner corner of the eye


With the shift in seasons comes daylight savings time, and while you do gain an hour of sleep, sunshine spends less time in the sky, making you sleepy earlier than the summer months. If you’re struggling to wake up in the morning, Kline suggests hopping on the trend of highlighting the inner corner of your eyes. This simple hack takes less than a second but impacts your overall look. “To create this super-easy look, place a pearl/opal eyeshadow or highlighter on the inner corner of the eye using a small eyeshadow brush. Instant pop!” Kline says.


4. Berry Lips


Move aside red, red lip—Selby predicts that instead of the traditional bright-red lip color, fall will welcome a more berry tone, including shades of burgundy, merlot, plum, purple and even almost-black. “The deeper the shade, the more dramatic it looks. You can try a lipstick, lip gloss or even a stain. Keep the remaining makeup simple, other than some definition on the lashes,” he advises.


5. Dramatic lashes


When you’re in a rush to get out the door, do you sometimes skip certain parts of your makeup routine? We’re all guilty of going the easy route in a hurry, but Kline says to make sure your eyelashes get some love this autumn. Instead of the top lids getting all of the attention, it’s time for the bottom strands to be the star of the eyes. “Take your favorite mascara and put a few hearty coats on the bottom lashes. For a more smoky look, smudge black liner under it,” she says. “This adds intense drama to your going-out look!”


6. Unruly eyebrows


Thanks to celebrities like Emily Ratajkowski, who embraces the natural shape and fullness of her brows, letting your brows be the brows you were born with is in style this season. “I have been noticing a lot denser and fluffy brows, some unkempt, which are super beautiful,” Kline notes. To make sure you don’t go full cavewoman, but rather, chic and modern, Kline suggests using a brow gel to keep them in place, or investing in a brow pencil or powder that matches your hair color to add an extra dimension.


7. Natural-looking skin with peach accents


Natural makeup—which centers on flawless, dewy complexion—will continue to be in style this season, according to Selby. The only difference will be the presence of peach accents. “Peach works on so many skin tones and looks great with just a light layer of foundation,” he explains. To pull this off, apply a light-coverage foundation and then add peach blush to the cheeks, eyes, and lips. If you’re on the tanner side, Selby says to use a matte bronzer to subtly sculpt the cheeks just under the cheekbones.


Top 8 Amazing Makeup Hacks That Every Girl Must Try


With the wedding season almost at its peak, a few makeup hacks can go a long way in keeping you together for the evening. These tricks can help you save a lot of time and money, and also save you the trouble of going shopping for the products that you already have in your makeup kit. With just a few quick-fixes you can easily say goodbye to splurging on expensive makeup or professional help to get the look of a diva. Check out our amazing hacks and see your makeup woes vanish.

#1. Give your lipstick a matte finish and make it last longer


Usually, by the end of the day, your lipstick disappears into thin air, but you will not have to worry about this anymore. You can make your lipstick last longer, and also give it a matte finish by placing a tissue over your lips and then dusting some powder over the tissue with the help of a brush.


#2. Fix your broken lipstick with a lighter or match


It hurts to see your lipstick break when you least expect it, but there is a quick-fix to get it back in the holder. Use a lighter and melt the lipstick that is remaining in the lipstick holder. This melted lipstick will act as glue and hold the snapped section back in place. If you feel there’s a gap, then hold the lighter and melt the lipstick around the cracks and fuse the gap. Once you are done, place the lipstick overnight in the fridge and see the miracle the next day. Your lipstick will be as good as new.

#3. Make your own tinted lip balm


Get all the ingredients together first to get started. You will need:
An old lipstick
  • Vaseline
  • A small container
  • A metal serving spoon. 

Slice the lipstick and place it on the serving spoon. Then add the same amount of Vaseline to it. Now light the burner, and let the lipstick and Vaseline melt. You will need to stir so that they mix well under the flame. Make sure you keep the spoon at a safe distance from the burner. Once it mixes well, you can pour the mixture into an empty container and let it cool in the fridge. After half an hour or so, you will have a newly tinted lip balm ready to adorn your lips.

#4. Use a lash curler to apply eyeliner


Some of us dread applying eyeliner, mostly because our hands don’t keep steady and the lines on both eyes mismatch. So, here is an easy way out: draw an outline on your lash curler, curl your eye lashes, and voila you are done!


#5. Nude eyeliner can help disguise hangover


A nude eyeliner is a must in your beauty kit to save you from that hungover look after you have partied all night and have work the next day. To make your eyes stand out without a hint of a hangover, apply this nude eyeliner on your lower lid so that your lashes look longer. This creates an illusion of how awake you are when you are actually sleeping in your head. A miracle indeed, don’t you think?


#6. Business cards can help get a perfect winged-eye


Don’t throw away the many business cards lying in your drawer. Use them instead to get a perfect cat-eye makeup. Just place the card on the outer edge of your eye in a way that it meets the end of your brow. Apply the eye liner upwards, starting from the corner of your eye. The card will work as an outline for the liner. This will prove to be a very resourceful eye makeup tip for you.

#7. Use eye shadow as an eyeliner


If you have unused eye shadows, use them as eyeliners by adding some saline solution to them. The safest is the one you use to clean your contact lenses. However, if you want it to work both as an eye shadow and eyeliner, first dip your eyeliner brush in saline solution, then dip it in the shadow powder and apply it on your eyes. This can be an excellent way of tricking your friends into believing that you own an entire palette of eyeliner shades.

#8. Fix your favorite blush-on


If you have a favorite shade or a limited edition of blush, which is now crumbling or has accidentally shattered, here are three easy steps to revive your beloved blush. Just add a little rubbing alcohol (easily available at all chemists) to your powder blush in its case. The finish will most definitely not be as nice as when you first got it but when the alcohol evaporates, it leaves just the pigments behind for you to reuse. Use the alcohol sparingly to allow it to evaporate quickly. You can also use this to fix your favorite shades of broken powder eye shadows.


Now that you are wiser with your makeup essentials, go ahead and have all the fun experimenting with your looks. If you have any makeup hacks to share, do trade your secrets with us and your fellow readers too by leaving your comments below!


Monday, 18 September 2017

Dress to Impress: Groom Edition


For some, being fashionable is easy. They seem to always know just the right outfit to wear to any occasion. We may have a friend like this or we might be the friend. Then there’s those who aren’t super fashion savvy. But hey, it’s okay if you don’t always know what look to go for or how to go about putting it together. Not everyone attends fancy parties all the time or has a personal seamstress. Speaking of fancy, what about your wedding? Are you unsure of what look is appropriate for the groom what you should even be looking for? You’re not alone. It may not be often that you have to dress up this much so where do you even start? Read below for groom fashion 101.

Where to Start


You know you want to pick out a suit, but how do you start? Start doing some internet research to find places near you that specialize in formals for men. Finding the right shop is the absolute first step and an important one; the right place will have exactly what you need. Try to find one that has experience in weddings and if the fitting and alterations are done in-house. If you’re buying your suit, it’s much easier to have the buying and alterations all done in one place.

Here’s the thing about renting versus buying. Renting can always be seen as a bit of a risk, but it’s much more budget friendly than actually buying your suit. When renting, each store will have slightly different policies, so you’ll want to ask for details before deciding whether to move forward with it. For example, Men’s Warehouse has a rental policy where they ship your suit to you a week before your wedding day, or two days if you’re picking it up in store. That leaves you only that long to address any problems. However, they also have a policy that allows you to switch out any piece if it’s not fitting right.

Buying can be a more comfortable option if you have the budget because that suit is yours. You don’t have to worry about spilling anything on it or ripping it and now you have a suit you could re-wear for any dressy occasion. Again, money can be an issue here, especially if you’re trying to get a designer suit.

Buying can also enable you to get the outfit together on your own schedule. You can get your outfit altered and ready so that you have it ready to go for the big day long before the day actually comes.

What to Pick


When it comes to the actual outfit there are so many options to choose from that it can be overwhelming. Let’s break it down. First, you’ll want the suit to match the style of your event. Is your wedding more on the formal side? Then you’ll want to go with a full, black tie suit. These suits are very crisp and traditional. Is your wedding more laid-back, maybe rustic? If that’s the case, you may consider doing a standard men’s suit. These are the suits you see more commonly, like around the office. If you’re trying to go more casual you could also consider a vest with no jacket. This look has gained steam in the last few years and can still be formal and stylish without being too dressy. It’s also a more comfortable option in warmer outdoor weather.

What Accessories


Accessories matter, but what kind of accessories should you be pairing with your look? To start, you should understand what’s available.

As far as your neck goes and to keep it simple, you have two reasonable options: a tie, or bowtie. Now, even getting into these two categories can be overwhelming. First of all which do you choose? It’s important to keep in mind the feel of the event. A bowtie in a solid shade can be considered very formal. Of course, this can be less so if the bowtie is a funky pattern or color. Regular ties are versatile, which is nice because you really can’t fail. Your tie can help you lean ultra-fancy or more laid back.

Pocket square or no pocket square, that is the question. Accessories always add something so it’s important to consider whether your suit is “busy” or not. Is it patterned or are you planning to feature a patterned tie? Then a pocket square may be too much. However, in some cases where the suit is very simple, that pocket square can add the pop of color your outfit needs.

Jewelry—mainly watches, tie clips, and cufflinks—is pretty standard when it comes to grooms’ outfits. It’s up to you whether you want to add this bling. A nice watch can set off a suit very nicely. When it comes to deciding what to wear and what to leave out, decide how much is too much. If you’re putting on a bunch of these pieces and it looks a little busy, consider foregoing something.

There are other not so common accessories that may be right for your day. A lot of grooms express their goofy side with crazy socks under a formal suit. You don’t have to; you can always wear sensible socks if that’s more your style. Not as fun, but much more formal and traditional. Suspenders are another way to personalize your look. This is an especially great choice if your wedding is somewhat casual and maybe rustic or vintage themed.

Now that we’ve gone over some of the style basics, you can go forth into the groom’s fashion world with confidence. Hopefully you’re not completely overwhelmed. It can seem like a lot when you’re first getting started, but if you take it step by step and find some knowledgeable retail workers to help you, you’ll be just fine. If all else fails to ask for help! There’s bound to be someone around you who knows the ins and outs of men’s fashion. Don’t forget your partner too. They may be able to offer you helpful insights and opinions that lead you to your best look.


Source

8 Wedding Makeup Tips & Recommendations That Will Never Go Out of Style


Weddings are arguably the most photographed events most of us will attend in our lifetime. Whether you’re getting married or in the wedding party, you’re going to have phones, cameras and video cameras pointing at you all day.

With that in mind, we know you want to be confident in how you look—both on that day and twenty years from now when you’re reminiscing. We’ve got you covered with plenty of tips, tricks, and recommendations to look your best. Below, Christine Walsh, an esthetician and makeup artist at Dermstore Spa & Salon in Hermosa Beach, shares with us her best makeup tips for brides.
Timeless Bridal Makeup Tips and Recommendations

Whether you’re going to be doing your own makeup or hiring a professional, these tips are essentially universal. Here’s how to create a timeless, flattering and photo-ready look.

1. Enhance your natural beauty.


When you’re surrounded by loved ones on your special day, you want to look and feel like the best version of yourself—not someone unrecognizable. “Makeup is a tool to enhance one’s natural beauty,” says Christine, “not a mask to make you look like someone you are not.” To put this into practice, ask yourself what your favorite facial feature is—eyes, cheekbones, lips?—and then use makeup to define and enhance that feature. Easy confidence boost!

2. Save the trends and experiments for another day.


We love playing around with new products and colors as much as the next girl, but a wedding is “not the day to try a bold lip or blush on a whim,” Christine says. Save the fun new lip color for your honeymoon.


3. Stay away from heavy, creamy products.


For staying power and the ability to photograph well, Christine advises against heavy creams and foundations. “If you are feeling dry,” she says, “try a hydrating serum or a gel-like moisturizer on the day of the wedding.” If your skin is more on the combo-to-oily side, she suggests, “a mattifying primer to cut back on the shine that can develop as the day goes on.”

4. Opt for waterproof mascara and eyeliner.


Tears, sweat, and rain (knock on wood!) are the enemies of a finished makeup look—and these can all be commonplace at wedding ceremonies and receptions. Avoid dealing with the dreaded raccoon eyes by choosing long-lasting mascara and eyeliner.

5. Stick to a neutral-colored lip.


Christine recommends choosing a light pink or a peachy nude lip color to keep your look fresh and timeless. She also strongly suggests choosing a lip stain over lipstick or gloss for its superior staying power.

6. Never neglect the eyebrows.


“Even if you don’t fill them regularly,” says Christine, “the power of a good brow truly is the foundation to your facial feature framing.” A little color and grooming will go a long way!

7. Lock in your look with setting spray.


Once your makeup is picture perfect, make sure it stays that way all day (or all night) long with a good setting spray.

8. Keep a touch-up bag nearby.


Christine recommends storing blotting powder/papers and your lip stain within the bag to touch up your look if necessary. Ask one of your trusted bridesmaids to hang onto it for you during the day.


Bonus Tips (If You’re Hiring a Makeup Artist)

If you’re getting your makeup professionally done, here are a few extra tips to ensure your makeup artist creates a look you’ll be more than happy with.

1. Schedule a makeup trial at least three weeks before your wedding.


This will help you try out a couple of different looks, if you’re unsure, as well as work out any kinks before the big day. Christine suggests scheduling a trial during the day and taking pictures in natural lighting to get a better idea of the finished look.

2. Be sure to tell your makeup artist about any specific concerns or ideas.


If you have skin concerns (oiliness, dryness, sensitivities), allergies or specific ideas about your look, tell your makeup artist ahead of time to ensure a smooth trial and session on the big day.

3. Ask the makeup artist about their process for the wedding day.


Does the artist work out of a salon, or would they be able to travel to you? How long would the makeup-application process take? This will help you with scheduling your getting-ready time on the day of the wedding.


Best Bridal Makeup Artist in Lucknow.
Best Beauty Salon in Lucknow.


Source

Friday, 15 September 2017

10 Steps To Do Flawless Makeup At Home To Rock At Any Wedding


How many of you love getting ready for a wedding or a party or any other special occasion? And, how many of you get confused as to what comes first– eye makeup or foundation, eyeliner or mascara? Don't worry (READ: Worst Makeup Mistakes). We are going to guide you, step-by-step on how you can do your makeup at home for occasions like weddings.


Step #1


Begin with skin care and then use primer


Make sure that you are using your regular moisturiser and allowing it to seep into the skin, at least 15 minutes before moving on to a foundation. After moisturiser, and before foundation, I would strongly recommend using a face primer. A primer makes your foundation last longer. It acts as a barrier between your skin and the foundation.

Step #2


Move on to the Foundation


Now, the moisture and primer will make the application of your foundation very smooth. So, apply a good foundation of your choice- powder, liquid or cream. Make sure that you set the liquid or cream foundation with a loose powder so that your foundation stays all through the day.

Step #3


Time for the eyeshadow


Remember, your eyes should not 'match' your outfit; it should ‘complement’ the colours on your dress. Use colours that are opposite of the colours on your dress. The key to applying eyeshadow is using a flat eyeshadow brush, and then a fluffy dome-shaped brush to blend. Make sure you apply a darker colour in your crease and follow it up with a highlighter up to your brow bone. This softens any harsh lines that could be visible to the naked eye.


Step #4


Kajal, followed by the eyeliner


Apply a black, brown, blue or green coloured kajal in the waterline and then line the lash line with black eyeliner. You could use a pencil, gel or liquid liner– whichever you feel comfortable with. Indian women look great in a winged liner. But, never ever think of complementing your smokey eye with red lips! It is always ‘smokey eyes with nude lips’ or ‘bright lips with nude/neutral eyes’.


Step #5


Time to curl your lashes and apply mascara


Remember, always curl your lashes first and then apply mascara. If you do it the other way round, your lashes are going to break. While, an eyelash curler is the most underrated makeup product, using a curler can make your eyes look ‘awake’. Apply mascara from the roots of the lashes, and wiggle the wand in a zigzag motion till you reach the tip. This will add definition and volume to your lashes.

Step #6


Moment to add some blush


For a natural looking glow, apply blush on the apple of your cheeks with an upward movement going into the hairline. The best way to judge where the blush needs to be applied is by smiling in the mirror, this way, you will get to know the high-rise points of your cheeks. Use a big fluffy brush to blend the blush on the cheeks.


Step #7


Contour and highlight


Next, use a brown matte shade which is two shades darker than your skin colour to contour your cheeks. Suck in your cheekbones, notice the hollows and apply the contouring powder there and blend. No lines must be visible. To highlight, apply a shimmer blush or powder on the high plains of your face, which are the T-zone and cheekbones. The idea of applying a highlighter is simple– when light falls on any of these areas, your skin is going to give out a sheen which looks amazing, especially in photographs.

Step #8


Line your lips


Before you begin with your makeup, make sure that you have applied some lip balm. This will keep your lips moist and will allow your lip liner and lipstick to glide on easily. Remove the lip balm with a tissue and line your lips with the help of a lip pencil. Lip liners are brilliant as they act as a base for your lipstick! It is a good idea to fill the entire lip with the pencil before you move on to your lip colour.

Step #9


Apply your lip colour


Run your lipstick over the base coat, then take a tissue and place it on your lips to remove the smudges. After this, run some loose powder with a brush, over your lips. This will make your lipstick last much longer! After this, apply another coat of the lipstick and gently press a tissue over. Now you can eat or drink anything, your lips are not going to lose their colour!


Step #10


Get ready to smile

Now that you have followed all the steps, walk with confidence and do not forget your million dollar smile! Don't worry if you have not followed a certain step to the T, just remember the key to look gorgeous is to be confident and happy.


Best Bridal Makeup Parlour in Lucknow.
Best Beauty Salon in Lucknow.


Source